How Long Do Carved Pumpkins Last? Keep Your Jack-o’-Lanterns as Long as Possible
“How long do pumpkins last?” is a surprisingly common but reasonable question this time of year. More specifically, you might be asking, “How long do carved pumpkins last?”
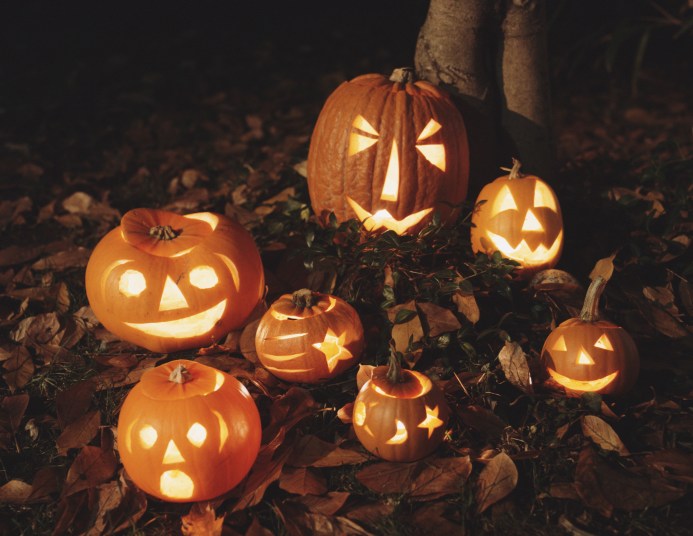
Because, let’s be honest, carving a Halloween pumpkin is a serious commitment! First you have the emotional roller coaster that is picking your perfect pumpkin. After all, there are more than 50 different types of pumpkins grown in the United States to choose from. Do you go fat and round? Tall and thin? Mini and flat? And what about color?
No matter your pumpkin preference, you always end up getting attached to the adorable little (or big) decorative gourd that comes home with you. Choosing how to carve your jack-o’-lantern is another round of difficult decisions: What style are you going for? Do you cut it freehand or do you use a pumpkin stencil? The pumpkin-carving struggle is real — and very time consuming.
Once you’ve gone through the whole ordeal and have a beautiful carved pumpkin you’re ready to show off, the last thing you want is for your hard work to be destroyed. From hungry bugs and squirrels to bothersome rot and (worst of all) teenagers, there are a lot of threats you need to protect your pumpkin from.
The good news? We’ve got your definitive guide to all things pumpkin preservation right here. You’ll not only get answers to common questions like “Why do carved pumpkins rot?” “How long do carved pumpkins last inside?” and “How to preserve a carved pumpkin?” but you’ll also find the fascinating history behind jack-o’-lanterns and Halloween gourd carving in general.
Why do carved pumpkins rot and break down?
Before learning how to keep pumpkins from rotting, you need more information about the whole process. The short answer to this question is that pumpkins are like all other living things: They’ve got to expire sometime. Naturally, pumpkin rot happens when the squash is exposed to air (aka oxidation) or loses moisture (aka dehydration), so rotting essentially begins the second the pumpkin is cut from the plant.
But that rotting process can be pretty slow going if the pumpkin is left alone. In fact, a healthy, uncut pumpkin can last for three to six months if it’s stored somewhere dry at about 45 to 50 degrees Fahrenheit, according to the University of Illinois. And that’s thanks to the pumpkin’s thick skin, which protects the gourd’s very soft inside from everything outside: extreme weather, fungi, bacteria, mold, and insects. The rotting process really begins the second the inside of a pumpkin is exposed to these things.
So, carving a pumpkin means you are exposing it to those elements, which in turn means your carved pumpkin is going to eventually rot and break down. This is every carved pumpkin’s fate, sadly, which is why some people prefer to stick with no-carve pumpkin ideas for their Halloween decor. But if you’re a carved-pumpkin purist, you can at least slow down your jack-o’-lantern’s decline by following some simple rules.
How to Keep Carved Pumpkins From Rotting
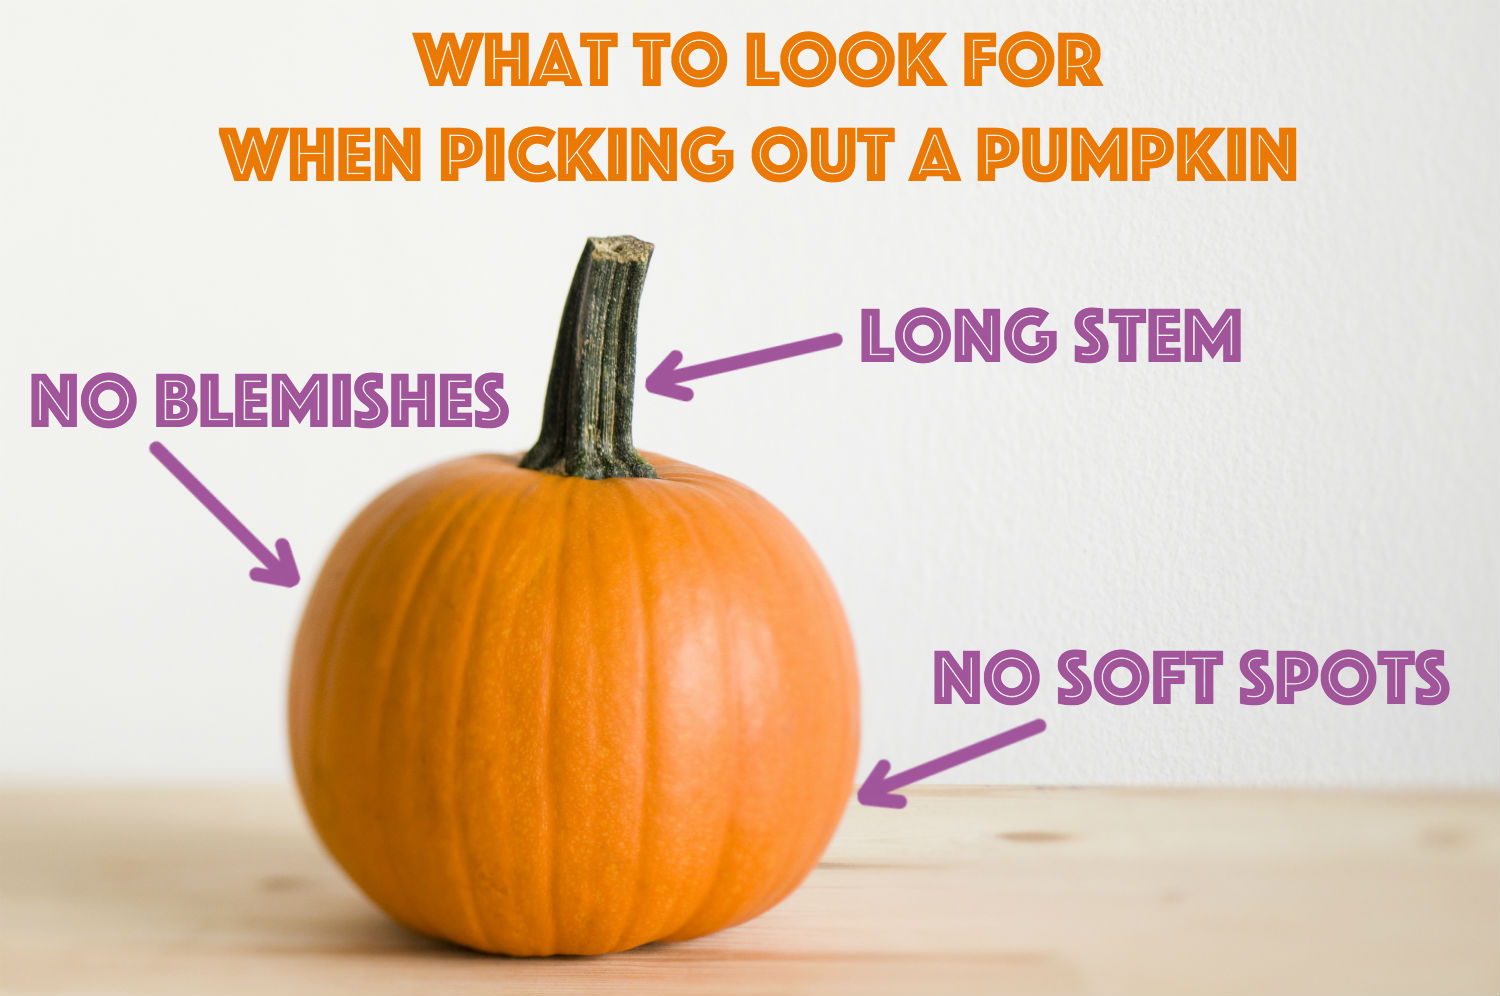
When asking yourself how to keep a pumpkin from rotting after carving, one of the most important steps to make sure you don’t end up with pumpkin mold before it’s even Halloween is picking the right one from the get-go. Here’s how to pick a good pumpkin that won’t rot right away:
1. Look at the pumpkin’s stem. If a pumpkin’s stem is less than one to two inches long, the pumpkin will decay quicker. You also want a pumpkin stem that’s thicker and greener, which means the pumpkin is healthier and better for carving. Pro tip: Don’t lift pumpkins by the stem — it can cause damage and make them age faster!
2. Check the pumpkin’s skin for blemishes. Some dents and boils are just unique shapes that happen while the pumpkin is growing, but if the skin is actually punctured, gouged, or dinged, the pumpkin is more likely to attract pests and rot faster.
3. Feel the pumpkin for soft spots. Just like other gourds and produce, a soft area on a pumpkin means it’s already started to rot. You want a pumpkin that is uniformly firm when you press on it. If a pumpkin feels heavy and loose inside, skip it — the insides might already be rotten.
4. Buy your pumpkin from a local patch. It’s common sense: Produce purchased locally is fresher because it takes less time and distance to get to you. The closer the pumpkin is grown to you, the less bruising and damage it suffers after being picked. Not sure where to find your local pumpkin patch? Local Harvest has a full list of pumpkin growers and U-pick farms near you!
How to Make Carved Pumpkins Last Longer
Once you’ve picked out a perfect, unblemished, local pumpkin, there are more steps you can take to preserve it. How long carved pumpkins last depends on where you live and how you’re displaying your carved pumpkin. But, more generally, here is how to make your carved pumpkin last longer:
1. Don’t cut the top off. We know, we know — this goes against all pumpkin-carving logic. But when you cut the stem from the rest of the pumpkin, it no longer has access to the nutrients in the stem so it will wilt faster. Instead of cutting from the top, follow in the footsteps of professional pumpkin carvers and make a hole in the back of the pumpkin instead.
2. Make sure you scrape out all of the pumpkin guts. This reduces the likelihood of bugs and fungi coming to try to eat the pumpkin pulp and speed up the rotting. It also has the added benefit of thinning the skin a little so that your pumpkin is easier to carve!
3. Give your carved pumpkin an antifungal wash. There are about as many theories on how to go about protecting your pumpkin’s interior from fungi and mold (which speed up the rotting process) as there are types of jack-o’-lanterns. Research on carved pumpkin preservation methods is quite limited, but the tests we could find showed that a bleach bath is the most effective way to make your pumpkin last longer. That said, here are the three very common methods:
- Wash your pumpkin with bleach. Most expert pumpkin carvers will tell you they bathe their jack-o’-lanterns in a very small amount of bleach mixed with cold water. Use about 1 Tbsp. of bleach for every quart of water.
- Spray your pumpkin with peppermint soap. If you want to go the all-natural route, you can wash your carved pumpkin with peppermint dish soap (peppermint has antifungal properties). To clean your pumpkin, put a small amount of peppermint soap — we recommend Dr. Bronner’s Peppermint Pure Castile Liquid Soap ($18.48, Amazon) — into a clean spray bottle and lightly spray the inside of your carved pumpkin.
- Spray your pumpkin with lemon juice or vinegar. Another pumpkin preserving spray you can try is diluted lemon juice (one part lemon juice to one part water is recommended) or vinegar is another all-natural way to prevent pumpkin rot. If you’re wanting to know how to keep squirrels from eating pumpkins too, the vinegar method is a great option for deterring the pesky critters.
- No matter what method you use to kill germs, make sure you dry your pumpkin thoroughly when you’re finished so you don’t undo your hard work trying to fend off mold.
4. Seal in moisture with petroleum jelly. Because dehydration is one of the main causes of pumpkin rot, you want to make sure your pumpkin retains as much moisture as possible. Petroleum jelly to the rescue! Apply a thin layer of Vaseline Petroleum Jelly ($7.50, Amazon) to all of the cut edges of your pumpkin (you might want to use a cotton swab or paper towel in tighter areas) to prevent losing extra moisture.
5. Refrigerate or soak your carved pumpkins overnight. If you live in a warmer area, rather than leaving it out on the porch at night, you could try to extend the life of your jack-o’-lantern by putting it in the fridge or a large bucket of cold water. Before putting it in the fridge each night, spray the inside of the pumpkin with the peppermint soap mixture again and then wrap it in a trash bag so that it gets the chance to rehydrate.
You can also help your pumpkin rehydrate by placing it in a bucket of cold water overnight. Note: You don’t need to do this for carved pumpkins that have been out for less than a week (and even longer if you live in a cooler area). But once you notice signs of your pumpkin wilting, it’s worth giving it a nighttime soak.
6. Wrap it up when it’s not on display. Some pumpkin-carving enthusiasts swear by tightly wrapping their jack-o’-lanterns in plastic wrap whenever they’re not being displayed.
7. Keep bugs at bay. Just like other fruits — yes, pumpkins are fruits! — pumpkins attract fruit flies. Setting a natural trap for fruit flies near your pumpkin can help protect your pumpkin from pesky bugs (not to mention keep your home free of a fruit fly infestation!).
Do carved pumpkins attract bugs?
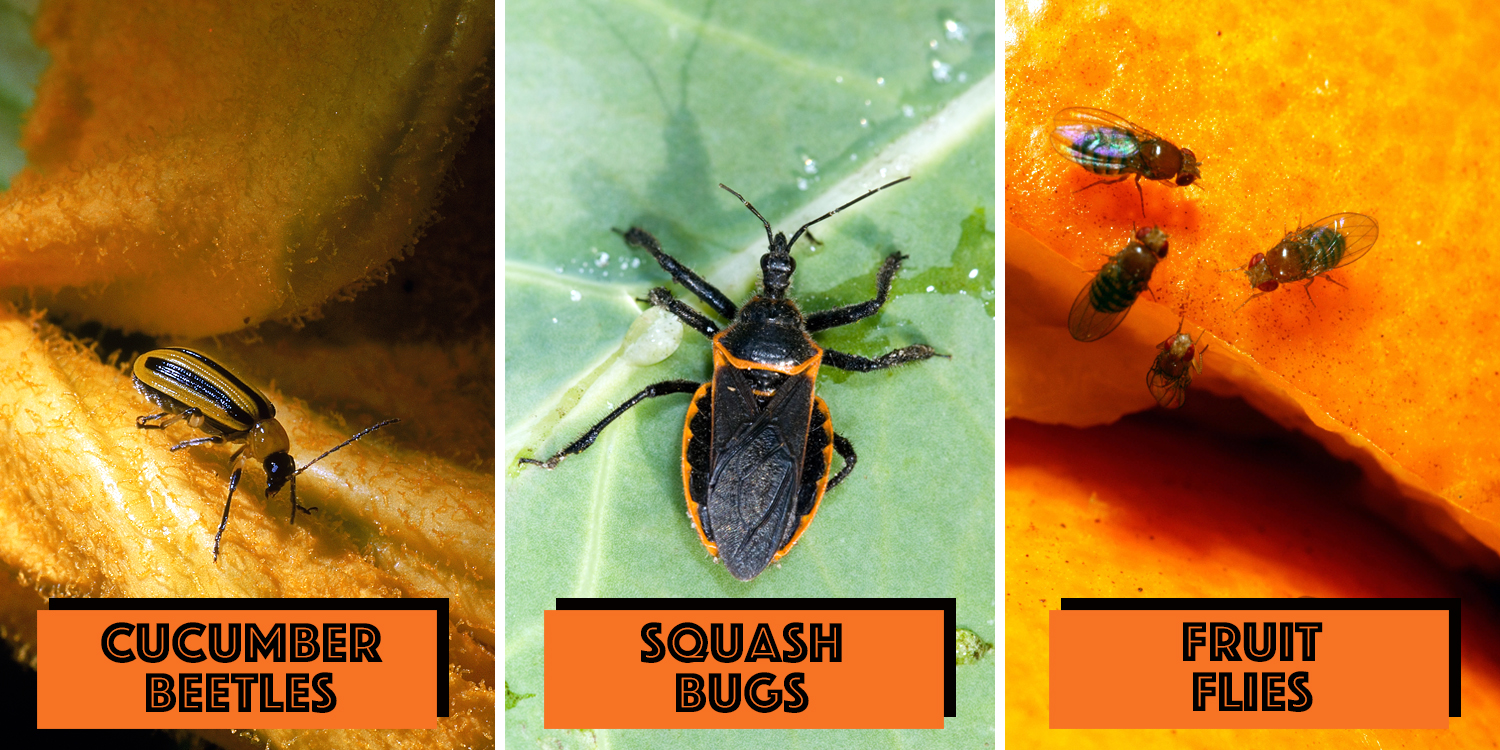
You can bet on it! The Farmer’s Almanac notes that there are many insects that eat pumpkin, but two of the biggest threats are cucumber beetles and squash bugs, both of which attack pumpkins at all stages of growth. But when it comes to a jack-o’-lantern, your biggest bug problem will be fruit flies, which is why you’ll want to set a trap somewhere near your pumpkin to keep the pests away from your masterpiece.
Powdery mildew is not exactly a bug, but is still another major problem for people who like pumpkins. It’s a fungal disease that affects the leaves of pumpkin plants, so it’s only a problem if you are growing your own pumpkins. The white, powdery mold is pretty easy to spot: It grows on the tops of pumpkin leaves, eventually killing them, and it can also interfere with how the pumpkin ripens. If you see powdery mildew developing on your pumpkins (or any of the plants in your garden, for that matter), there’s a simple, natural remedy that’s been proven effective at treating powdery mildew: Spray milk on it! You can also skip the issue altogether by planting only varieties of pumpkins that are powdery mildew resistant, known as PMR.
Can these pumpkins stay inside?
Of course! When you’re decorating your home for Halloween, you can absolutely display jack-o’-lanterns inside. Just keep in mind that pumpkins fare best in dry, cool places. Where to put carved pumpkins is up to you, but we wouldn’t recommend putting a carved pumpkin in your bathroom where it’s wet and warm, for example!
Also remember that carved pumpkins are like any other fruit: They attract bugs. You can ward away pests with DIY solutions or only display your carved pumpkin inside for special occasions, leaving it in the fridge or on the porch the rest of the time.
When to Carve Pumpkins for Halloween
How long are carved pumpkins good for naturally? Well, the answer to that depends on the temperature in your area. Many people have done tests to see when is the earliest they could carve a pumpkin before Halloween, and the general consensus appears to be about five days before October 31.
If you live in a cooler area and plan to care for your precious pumpkin as if it were your own child, you might be able to schedule your carving sesh a little sooner, but we wouldn’t recommend any earlier than a week before Halloween.
Why are they called jack-o’-lanterns, anyway?
As is the case for many of our favorite pastimes, carving jack-o’-lanterns for Halloween is said to come from an Irish myth: A man named “Stingy Jack” asked the Devil to have a drink with him, but then didn’t want to pay for his drink. Jack managed to get the Devil to turn himself into a coin to pay for the drinks. But instead of paying for the drinks, Jack kept the coin and put it in his pocket next to a silver cross, which meant the Devil was stuck as a coin. Eventually Jack let the Devil go — so long as the Devil didn’t bother Jack for a year.
After that year had gone by, Jack and the Devil met again, and this time Jack tricked the Devil to climb into a tree, which Jack then carved a cross into. The Devil promised not to bother Jack for 10 years in order to be freed from the tree.
Once Jack died, God refused to let him into heaven, and the Devil was still upset about Jack’s trickery, so he wouldn’t let Jack into hell, either. Instead, the Devil sent Jack to wander around in the dark with only a piece of burning coal as his source of light. Jack put the coal into a carved-out turnip and has roamed the Earth ever since. Over time, the Irish “Jack of the Lantern” became known worldwide as “Jack O’Lantern”!
Where did carving pumpkins come from, and what was carved before pumpkins?
Thanks to the myth of Stingy Jack, Irish, Scottish, and English people started making their own Jack O’Lanterns. They carved scary faces into turnips, potatoes, and beets, and then placed them in windows or doorways to keep Stingy Jack and other evil spirits from coming into their homes.
As these communities began to come over to the United States, they brought the practice with them. They soon discovered that pumpkins — which are native to America — were even better for making jack-o’-lanterns. So that’s where carving pumpkins came from, and that’s how it became a beloved nationwide activity every October. Happy carving!