6 Common Makeup Mistakes That Could Be Irritating Your Skin + Easy Pro Fixes
Plus, how to know if your makeup has expired

Have you ever wondered, “Why am I suddenly breaking out?” Many things can cause pimples to pop up unexpectedly from skincare and hormone fluctuations to diet. But the culprit could be something you hadn’t even thought of — your makeup. “There are common hygiene mistakes people are making in their makeup routines that could be inviting bacteria, blemishes and worse,” says Saffron Hughes, a makeup artist for FalseEyelashes.co.uk. Most of us know we should scrub those makeup brushes and sponges occasionally, but if you’re diligently washing your tools and still having issues, it’s time to dig a little deeper into what could be brewing in your makeup bag. We asked Hughes to share common makeup mistakes that could be making your skin worse!
6 common makeup mistakes that irritate skin
Common makeup mistake #1: Storing your makeup in a bag
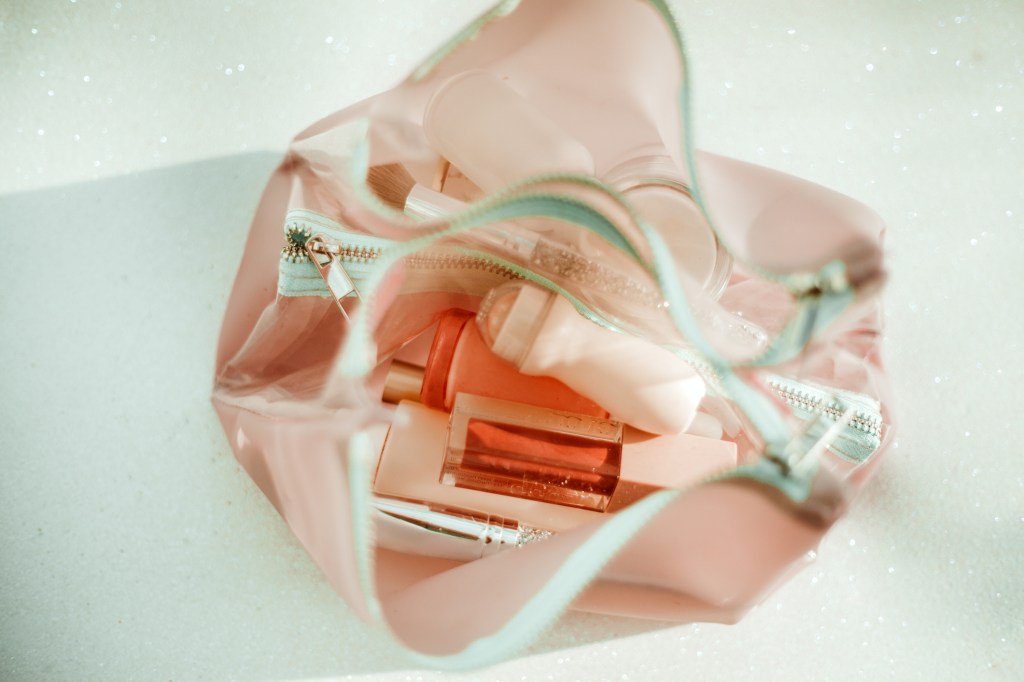
While makeup bags are a common spot to stash all your supplies, Hughes says they are a hygiene disaster, whether on your bathroom counter, in your suitcase for travel or in your purse for daily use. Researchers in England found that nine out of 10 makeup bags are contaminated with potentially deadly germs like E. coli because we don’t clean them properly — or at all.
“Dead skin cells and bacteria from your brushes are transferred to your makeup bag after every application and then onto your skin,” she explains. “Instead, you should store your makeup in drawers or a dressing table, as the materials are easier to clean than a fabric makeup bag.”
If you need to use a makeup bag, clean it thoroughly every 1-2 months. If you notice any spills or stains, wipe those immediately to avoid any chance of bacteria buildup.
Here’s how Hughes suggests you keep your makeup bag germ-free:
- Empty the bag: Remove all makeup products, brushes and accessories from your makeup bag. This includes everything from lipsticks and eyeliners to makeup brushes and sponges.
- Shake out debris: Turn the bag upside down and shake to remove any loose debris, such as makeup residue or dust.
- Spot clean stains: If there are any visible stains on the bag’s exterior, spot clean them using a gentle detergent or stain remover appropriate for the bag’s material. Use a soft cloth or sponge dampened with the cleaning solution to dab at the stains until they lift gently.
- Wash the bag: Depending on the material of your makeup bag, you can hand wash or machine wash it by filling your sink with warm water and adding a small amount of mild detergent (baby shampoo works, too!). Submerge the makeup bag in the soapy water and gently agitate it to ensure the detergent penetrates the fabric. Use a soft brush or sponge to scrub any stubborn stains or areas of buildup, and rinse the bag thoroughly with clean water until all soap residue is removed. Allow the bag to air dry completely before using it again.
- Clean the interior: Wipe down the bag’s interior with a damp cloth, baby wipe or disinfectant wipe to remove any makeup residue or spills.
- Sanitize brushes and tools: While cleaning your makeup bag, take the opportunity to sanitize your makeup brushes and tools. Wash them with gentle soap and water, or use a brush cleaner and let them air dry by laying them flat on a clean towel. Things like tweezers and scissors can be wiped down with an alcohol wipe. (Click through to learn how to clean your brushes and sponges.)
- Organize and restock: Once the bag is clean and dry, organize your makeup products, brushes and accessories neatly inside. Discard any expired or unused products and replace them as needed.
Even if you store your cosmetics in a drawer, it also requires an occasional wipe down. “Simply use a hair dryer to remove all loose dirt and dust at the bottom. Next, apply a mild soap and water solution with a microfiber towel. Rub the marks until removed, and rinse well with clean and clear water. Dry your drawers with a towel until fully dry,” says Hughes.
Common makeup mistake #2: Leaving the lids off
In the morning rush, you may be tempted to leave your foundation bottle’s top off or powder lid open to save time. But this is also a no-no, says Hughes. “Accidentally leaving makeup product lids open is a silent invitation for bacterial growth. Double-check that the lid is tightly shut to prevent moist air from entering the product and creating the perfect humid conditions for bacteria. Wet conditions, like those found in bathrooms, should also be avoided for makeup storage for similar reasons,” she advises.
Related: Read This Before You Toss Out That Broken Makeup! Genius Alcohol Hack Can Fix
Common makeup mistake #3: Not cleaning your makeup
While we’ve already discussed cleaning our makeup brushes and bags, did you know you should also clean your makeup? Dust, dead skin cells and product buildup can accumulate on the products themselves. “The same study found E. coli, fungus and staph bacteria on various makeup products, all of which can cause serious skin infections,” says Hughes. Makeup artists regularly do this between clients to keep things sanitary, but Hughes says you should do it, too.
For powder products like shadows, blushes and pressed powders: Use a clean tissue or paper towel to wipe away the top layer of the product. Spritz the surface of the product with rubbing alcohol (70% or higher) until it’s visibly wet, and allow the alcohol to air dry completely before using the product again.
For cream or liquid makeup like foundation, concealer or cream blush: Squeeze a small amount of product onto a tissue or paper towel and discard. Use a clean spatula or cotton swab to remove the top layer of the product. Next, wipe down the exterior packaging and pump mechanism (if there is one) with a disinfectant wipe. Close the packaging tightly to prevent contamination.
Makeup pencils like eyeliners and lipliners: Sharpen wooden pencils to remove the outer layer before each use. For twist-up pencils, wipe down the exposed product with a disinfectant wipe. Remember to regularly sanitize the sharpener by spraying on some rubbing alcohol.
Related: Say Goodbye to Redness, Bumps & Irritation — Dermatologists Reveal How to Get Rid of Rosacea
Common makeup mistake #4: Not cleaning your beauty blender after use
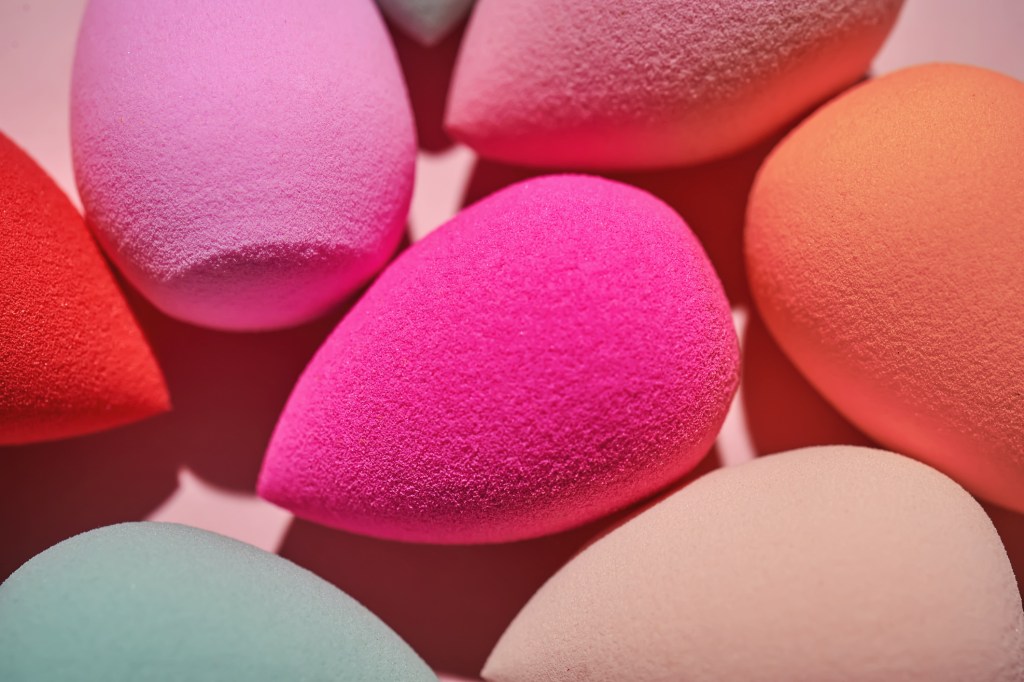
Beauty blenders, aka makeup sponges, can harbor so much bacteria that we opted to give them their own section! “Just as the viral TikTok video shows, mold growth in beauty blenders and other makeup sponges is quite common. This happens for several reasons. Firstly, the porous structure of beauty blenders and makeup sponges allows them to absorb dirt, oils and leftover makeup residue, creating an environment where mold is likely to grow if the beauty blender isn’t regularly or adequately cleaned,” she explains.
Se the video here:
“When mold combines with dirt and grime, it clogs pores, which can bring on an array of other skin problems, including breakouts, skin irritations, redness and more. Keeping these clean and mold-free after every use is important to avoid these skin-related risks.”
To clean your sponge, wet the makeup sponge with lukewarm water. Apply a small amount of gentle shampoo or brush cleanser to the sponge and gently squeeze and massage it to work up a lather. Rinse the sponge under running water until the water runs clear and all soap residue is removed. Squeeze out excess water and allow the sponge to air dry completely before using it again.
Related: How to Clean a Beauty Blender in Less Than Two Minutes
Common makeup mistake #5: Ignoring the expiration dates
Like the milk in your fridge, your makeup also has an expiration date. Expired makeup products can harbor harmful bacteria, fungi and other microorganisms, especially if exposed to air or touched with contaminated hands or applicators. Using expired makeup can lead to skin infections, irritation or even severe conditions like conjunctivitis (pink eye).
“The first thing you should always do before opening any new beauty product is check the label. You will find a small jar symbol on the label with a number followed by the letter M inside. The number followed by the letter M determines how long the product will work best and how long it should be used once opened and exposed to air,” explains Hughes. The “M” stands for months.
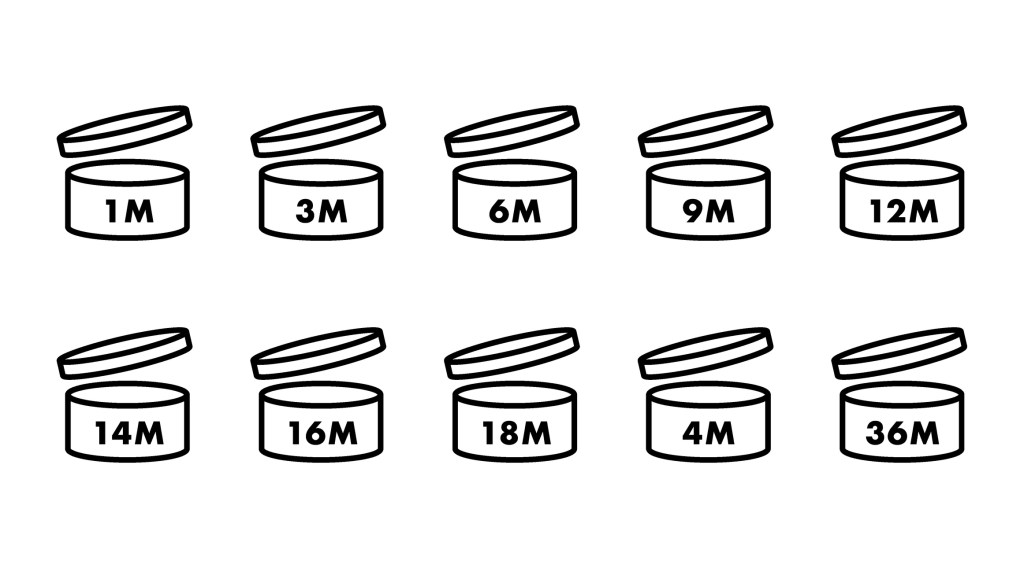
“After this timeframe, the products will decline in quality and can become a breeding ground for bacteria. So if it’s a product you’re less likely to finish using during the timeframe, note when you opened it to avoid disappointment,” she adds.
If it’s too late to do that, here are the average expiration dates for the most popular products:
Sponges or products with sponge applicators: Makeup sponges and beauty blenders have a shelf life of about 3 to 6 months, depending on how well they are cared for. They should be stored in a breathable mesh bag/pouch.
Mascaras: Mascaras have a shelf life of up to 6 months. “If the formula starts to appear clumpy and has an unpleasant smell, it should be disposed of sooner than six months,” says Hughes. Mascaras should be kept in a cool, dark place.
False eyelashes: False lashes have a shelf life of 6 months. However, most can be reused up to 8 times if you care for them properly. “The easiest place to store your lashes is in the tray they came in, which helps them keep their curved shape. Alternatively, you can purchase a lash case to store your favorite lashes,” suggests Hughes.
Related: The Secret That Takes Lashes From Thin to Thick Fast: An At-Home Lash Lift
Setting sprays: Cosmetic setting sprays have a shelf life of 6 months. “They are best kept cool or room temperature to avoid a warm spritz on the face. They can also be stored in the fridge for refreshment,” she explains.
Lash glue: Eyelash glue has a varying shelf life from 6 to 12 months. “Always remember to check the packaging. You should never store your eyelash glue in extremely low temperatures as this can cause the glue to separate. It should be stored in a dark place at room temperature,” says Hughes.
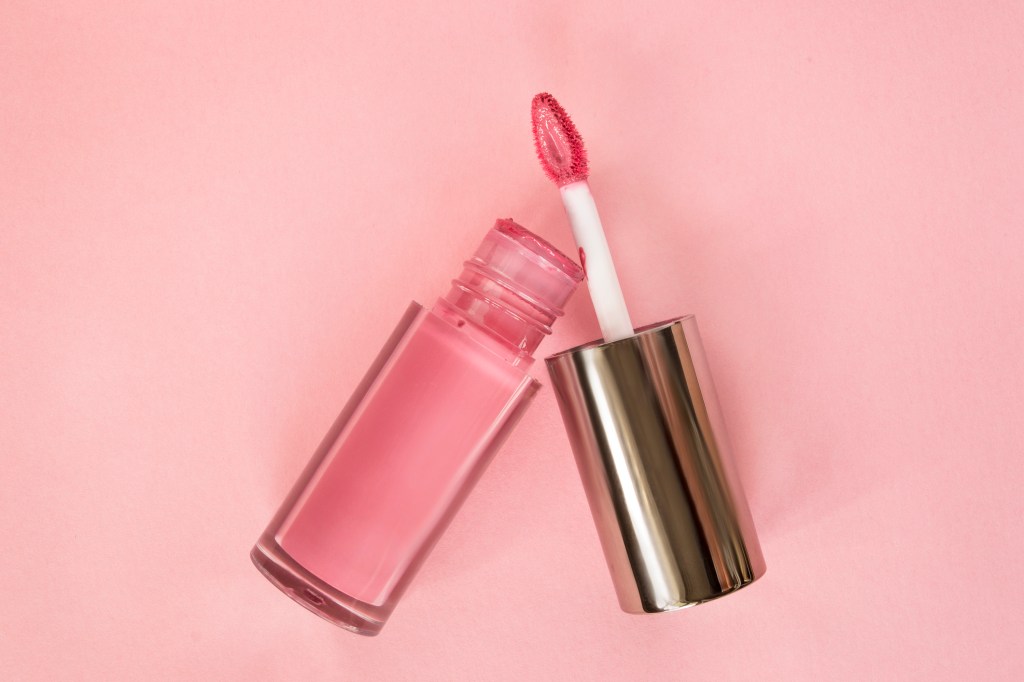
Liquid or cream-based makeup products: Liquid makeup cosmetics have a shelf life of 12 to 18 months. “This will vary depending on if they are water or oil-based. They should be stored in a cool, dark place as exposure to heat and sunlight can dry out products and cause natural oils to separate,” she says.
Powder products: Cosmetic powders have a shelf life of 12 to 24 months. “They can be stored anywhere that is cool and dry. Storing them in a humid area can cause powders to turn saturated and cakey, so avoid keeping them near radiators and heaters, and do not store them in the bathroom,” she warns.
Related: 8 Setting Powders for Mature Skin For the Perfect Final Step in Your Makeup Routine
Pencils: Cosmetic pencils have a shelf life of up to 2 years. “They should be stored in a cool/dry environment to avoid melting in the heat. They should be disposed of when they become dry and chalky,” advises Hughes.
Lipsticks and gloss: Lipstick and lip gloss have a shelf life of up to 2 years or can be used until the texture turns dry (lipstick) or goopy (lip gloss). “They should be stored in a cool, dry place, avoiding the bathroom, as the excess moisture in the air can break down the pigment,” says Hughes.
Makeup brushes: Makeup brushes have a shelf life of 1 to 5 years, depending on how often they are cleaned. “It’s best to store your makeup brushes upright in a brush holder/jar/container to preserve their shape. You can also fill the bottom of your containers with rice or pebbles to avoid your brush heads touching and cross-contaminating,” she suggests.
Common makeup mistake #6: Using something with a foul smell or change in color or texture
Have you ever brought the mascara wand close to your face only to notice a distinctive odor? That’s a tell-tale sign your makeup has spoiled and needs to be tossed. “One way of determining if your product has expired is by the smell,” affirms Hughes.
A change in texture is also a clue. “If your liquid products have thickened or become clumpy, toss them. Cosmetics also begin to separate, and this becomes very visible,” she adds. Finally, pay attention to its color. “Cosmetics oxidize when exposed to air. The longer that happens, the more likely they are to oxidize. So if your makeup looks more orange than usual, it’s most likely expired,” she says.
If you’re tempted to save a few bucks by using it anyway, you could spend that and more on products to fix the damage you’ve done to your skin.
For more skincare tips, click through these stories:
Sensitive Skin? Here’s How to Use Retinol for a Smoother, Glowing Complexion
Skincare Pros Reveal How to Get Rid of Keratosis Pilaris for Smooth, Bump-Free Skin
Dry Brushing Your Skin Fights Cellulite & Leaves You Glowing: How to Get the Perks