Homemade Nut Butter Recipes for Protein-Packed Treats Ready in 10 Minutes
Learn how to customize it with your favorite add-ins
Nut butters have become a staple in many kitchens, topping everything from morning toast to afternoon snacks and post-workout pick-me-ups. These creamy spreads are packed with protein and healthy fats, not to mention delicious flavor and texture. While store shelves overflow with a wide variety of brands, have you ever considered making your own? They’re easy to whip up, healthier and entirely customizable! We included 2 recipes that take 10 minutes with a blender and minimal ingredients. Plus, learn more about the benefits from experts and how to build your perfect spread. This is your guide to homemade nut butter.
Are nut butters good for you?
Nut butters have become a popular and convenient snack for good reason. Packed with a variety of nutrients, they make a good addition to a healthy diet. To start, “they can be a great source of protein for us,” says Danielle Rancourt, RD, at Pivot Nutrition. Protein allows us to build and maintain muscle., as well as support most of our body’s functions. Additionally, Rancourt adds that nut butters contain “not only healthy fats but some fiber, zinc, B vitamins and vitamin E.” These healthy fats include monounsaturated and polyunsaturated fats, which support heart health, lower bad cholesterol and support satiety.
However, the health benefits of nut butters can be overshadowed by what’s added to store-bought varieties. Hidden sugars, unhealthy oils and unnecessary additives can significantly diminish the nutritional value. Rancourt explains: “Though nut butters are nutritious, It’s important to keep portions in check as fats (nuts, nut betters) are calorie-dense (about 100 calories per Tbs.).” Always read labels carefully when shopping for your favorite brand and stick to the recommend serving size of 2 Tbs. a day.
The benefits of homemade nut butter
Making your own nut butter offers several advantages besides being incredibly easy. First, you can choose exactly what goes into your nut butter. Having control of the ingredients means you can skip any unfamiliar (and unhealthy) additives. “Homemade nut butters do not have the fillers that you may see inside of many of the store-bought brands,” says Rancourt. Moreover, you can customize your spread to suit your preferences. The world is your oyster, or should we say, nutshell! Experiment with different nut combinations, add sweeteners as well as incorporate spices for a unique flavor profile.
Homemade nut butter also guarantees the freshest possible product, free of any added preservatives. And while the initial investment of a food processor might be there if you don’t already have one, making your own nut butter can help your wallet in the long run.
Building your homemade nut butter
Creating your own nut butter just takes a few simple steps (and decisions). In fact, most nut butter recipes require 1-2 ingredients excluding add-ins. Below, we broke down the essentials you need, with some expert help, to whip up a delicious spread in no time.
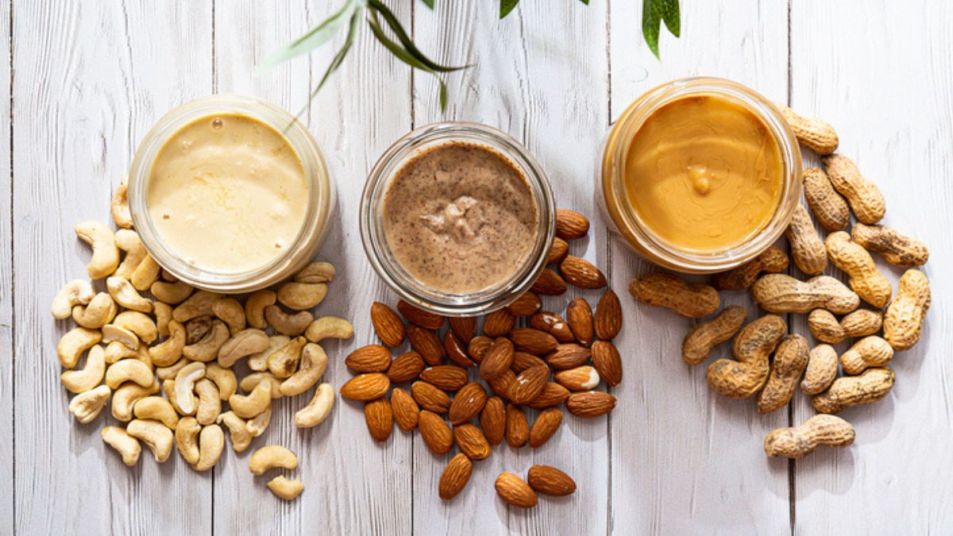
1. Nuts
The star of the show! “Most nuts work well, such as almonds, peanuts, cashews and hazelnuts,” says Tamara Earl, executive chef for Delectablez. You can also create a blend of nuts for a more complex flavor. If desired, choose raw nuts for maximum freshness. Chef Earl suggests “to toast the nuts first to enhance their flavor, then blend them until smooth. You can add a bit of oil (like coconut or peanut) if needed to achieve the desired consistency.” Check out the video below to learn how to perfectly roast your nuts in the oven.
2. Binding agents
While not always necessary, binding agents can help achieve the desired creamy texture. Popular options include water, neutral oils like avocado or vegetable, or even a drizzle of natural sweeteners.
3. Add-ins
This is where your creativity can shine. We love a pinch of salt for balance, but you can also sprinkle cinnamon for warmth or cocoa powder for a chocolatey twist. Vanilla extract, honey and maple syrup also offer added sweetness. And if you want a nutritional boost, scoop in some chia, hemp or sunflower seeds.
4. Equipment
A food processor will be your best friend for creating homemade nut butter. You’ll need those powerful blades to break down the nuts into a smooth and creamy consistency. But if you don’t have a food processor, a high-powered blender works fine, though the results may be less smooth.
2 easy homemade nut butter recipes
We found two simple and delicious nut butter recipes that won’t have you missing the store-bought jar. They both take about 10 minutes to make while using 5 ingredients or fewer.
Peanut Butter
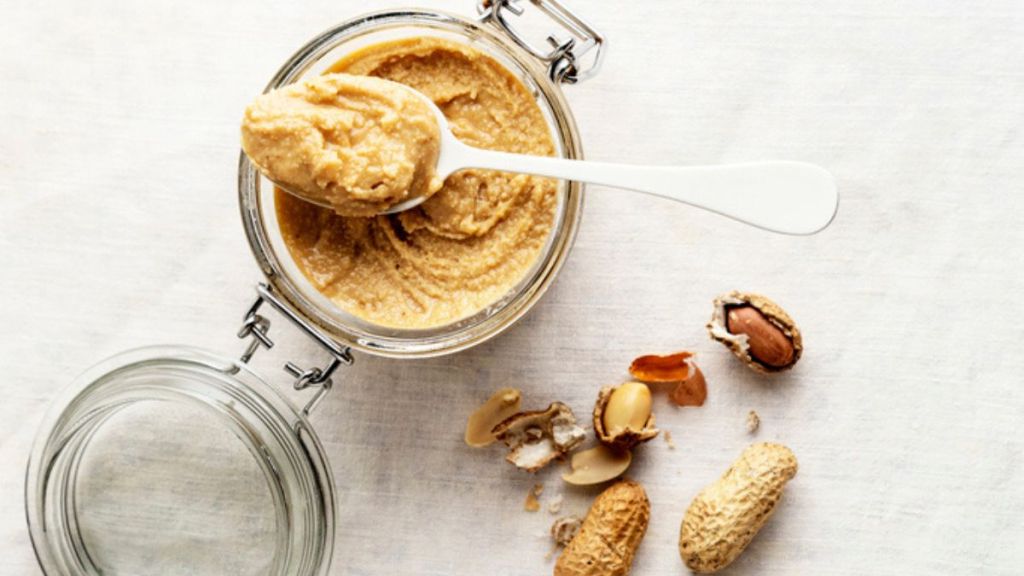
An all-time classic, but now homemade! Plus, this recipe from Pinch of Yum uses pre-roasted peanuts make it even faster.
Ingredients:
- 2 cups dry roasted peanuts
- 1-2 Tbs. honey or sugar
- Salt, to taste
Directions:
- Active Time: 5 minutes
- Total Time: 5 minutes
- Yield: 1½ cups
- Place peanuts in a food processor. Turn the food processor on and let it run for 4-5 minutes. During this time, you’ll see the peanuts go in stages from crumbs to a dry ball to a smooth and creamy “liquid” peanut butter. Stir in the honey and any additional salt, if you want.
Cashew Butter
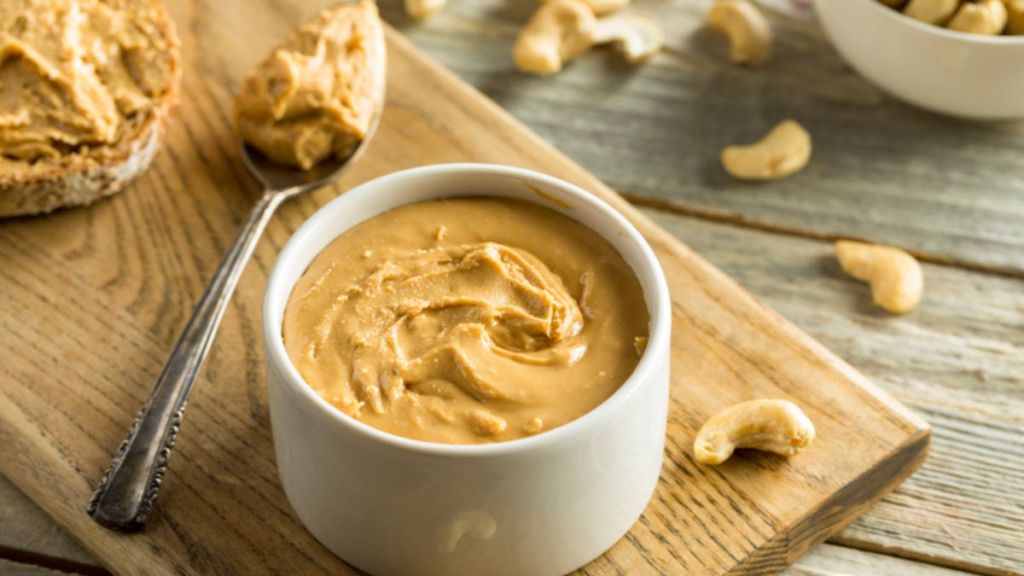
Flavored with fresh vanilla bean and a touch of sea salt, this recipe from Ambitious Kitchen is the perfect way to use cashews in your pantry.
Ingredients:
- 2 cups unsalted roasted cashews
- 1 Tbs. coconut oil, plus more if necessary
- ½ tsp. vanilla extract
- Seeds from 1 vanilla bean
- ½ tsp. sea salt
Directions:
- Active Time: 10 minutes
- Total Time: 10 minutes
- Yield: 1 serving
- Add cashews and coconut oil to your food processor and process for 5-10 minutes, scraping down the sides as necessary. At this point the cashews should start to clump together. Continue to process until you reach the desired consistency.
- Add salt, vanilla bean seeds and vanilla and process again for another minute. If it seems to be clumping together, add 1-2 tsp. more of coconut oil.
Note: You can use raw cashews instead of roasted cashews. To roast, place them on a baking sheet and roast at 350°F for 7-9 minutes.
Storing homemade nut butter
“Store homemade nut butter in an airtight container in the refrigerator to prevent rancidity and extend its shelf life,” says Chef Earl. “It can last for several weeks to a few months, depending on the nut variety and storage conditions. Just give it a stir before using, as natural separation may occur.” It also freezes well for up to 3 months. Be sure to divide it into smaller portions for easier thawing.
Have oily nut butter? Try this genius storage trick to prevent it from spreading.
How to use your homemade nut butter
As you probably already know, the uses for homemade nut butter are endless. But now you can enjoy your favorite healthy dishes without the guilt. Below, a few creative ideas to try.
1. Power up your bowls
Açaí bowls, oatmeal bowls, as well as yogurt parfaits can get a high-protein boost with a dollop of homemade nut butter.
2. Add it to salad dressings
Add a spoonful of homemade nut butter to your salad dressing for a creamy and protein-packed boost. It also pairs nicely with ingredients like balsamic vinegar or lemon juice.
3. Bake with it
Replace some of the butter or oil in your favorite cookie or muffin recipe with homemade nut butter for a delicious and healthier twist.
4. Make it a dip
Homemade nut butter makes a fantastic good-for-you dip for fruits and vegetables. Pair it with apple slices, banana slices or celery for an afternoon pick-me-up snack.
For more healthy homemade recipes, try making one of these below:
Homemade Coffee Creamer Is Healthier, Tastier + So Easy to Make With 3 Ingredients
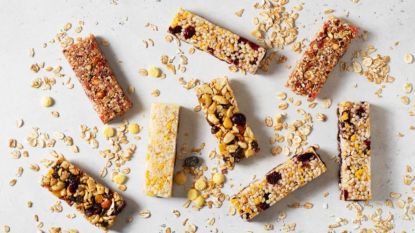
Homemade Protein Bars Are Healthier, Cheaper + So Easy to Prep in 5 Minutes
Turn Leftovers Into the Richest Homemade Chicken Stock: One-Pot Recipe Preps in 15 Minutes