Genius Storage Trick Prevents Peanut Butter From Separating — No More Oily Layer!
All it takes is a simple flip to avoid oily peanut butter for good!
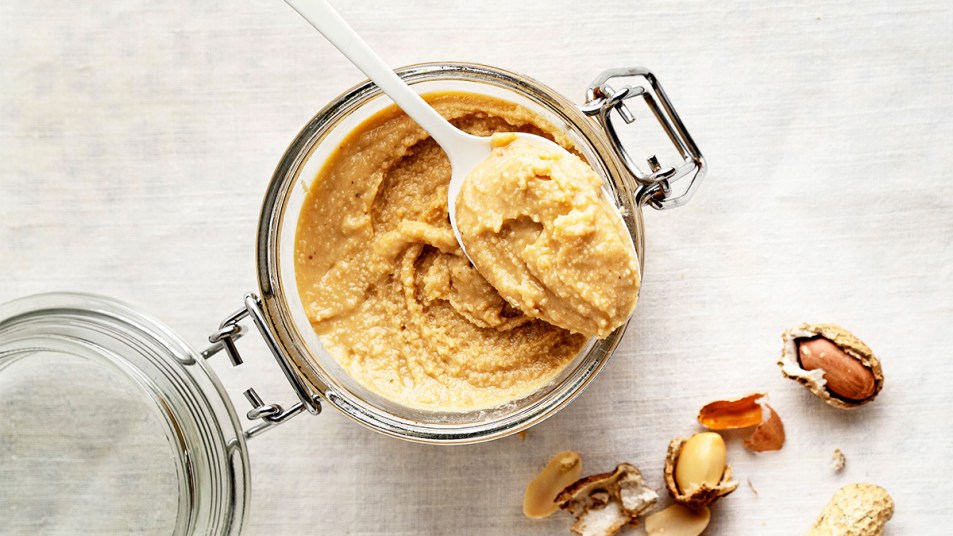
Spreading peanut butter over an apple makes for a delicious afternoon snack, but it’s not without some annoyances. Some varieties of peanut butter separate easily — even after you’ve mixed it up — leaving a layer of oil at the top of the jar when you’re ready to dig in. Luckily, a simple storage hack can help you enjoy a more evenly incorporated nut butter that’s easy to smear on practically any of your favorite foods. Keep reading to learn what causes peanut butter to separate and how to avoid it in seconds!
Why peanut butter may appear oily
As annoying as it can be to deal with, the layer of oil on top of peanut butter is a good way to tell how natural it is. Most natural peanut butters contain only peanuts and possibly some salt. Business Insider notes that the oil comes from the process of grinding the nuts and is more likely to rise to the top of the jar while the solid mixture sits at the bottom. This doesn’t happen with processed peanut butter because it has added oil, such as soybean, palm or cottonseed oil, which all mix together and prevent either one from floating to the top. These processed varieties may be less messy; however, natural peanut butter contains fewer ingredients that give you a more intense nutty flavor!
How to avoid oily peanut butter
Although natural peanut butter tends to separate, it’s easy to reverse this effect. Storing the jar upside down in your pantry will cause the oil to settle at the opposite end of the jar. Once you’re ready to use it, you can flip it to its normal position and the nut butter closest to the lid will be smooth, creamy and ready to spread without any excess oil in the way or the need to vigorously stir it beforehand. Be sure the lid is screwed on tightly so there are no spills when it sits upside down. To see how this hack works, watch the explainer below:
Bonus tip for perfectly smooth peanut butter
Another important tip is to keep the oil well-distributed throughout the jar by turning it every few days according to Real Simple. This prevents the oil from staying in one spot of the jar for long periods of time — providing you with ultra-spreadable peanut butter!
2 delicious nut butter recipes
With this handy tip, your go-to peanut butter will retain its thick, well-combined consistency whenever you’re ready to enjoy it. Give it a go before making these two recipes from our test kitchen! (Also, click through for these peanut butter dessert ideas and peanut butter smoothie recipes.)
Chocolate Peanut Butter Cake
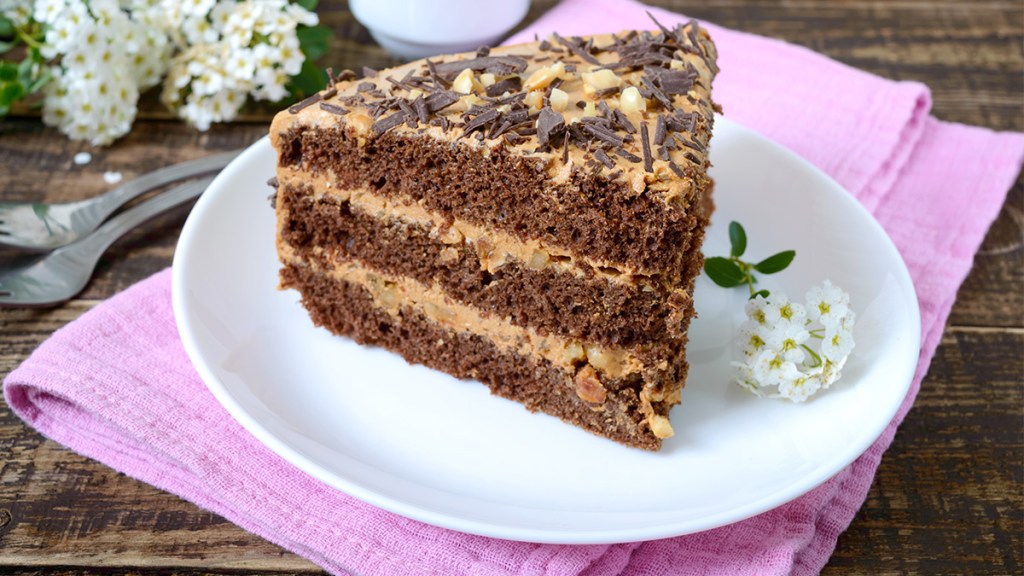
Our simple from-scratch nutty buttercream and fudgy ganache would be just as delicious over cupcakes.
Ingredients:
- 1½ cups (3 sticks) unsalted butter, room temperature
- ¾ cup creamy peanut butter
- 4 cups confectioners’ sugar
- 1 tsp. vanilla extract
- Orange concentrated food coloring
- 2 (8-inch) round baked chocolate cake layers
- ⅔ cup semisweet chocolate chips
- ½ cup heavy cream
Directions:
- Active: 45 mins
- Total time: 45 mins
- Yield: 12 servings
- On medium, beat butter and peanut butter 2 minutes. On low, add sugar and vanilla;
on medium-high, beat 2 minutes. Tint orange. - Place 1 cake on plate. Spread with 1½ cups frosting. Top with remaining cake. Spread top and side with remaining frosting. Chill.
- In microwave-safe bowl, microwave chocolate and cream in 15-second intervals, stirring, until smooth. Let cool. Pour over cake, letting some drip down.
Chicken Chow Mein
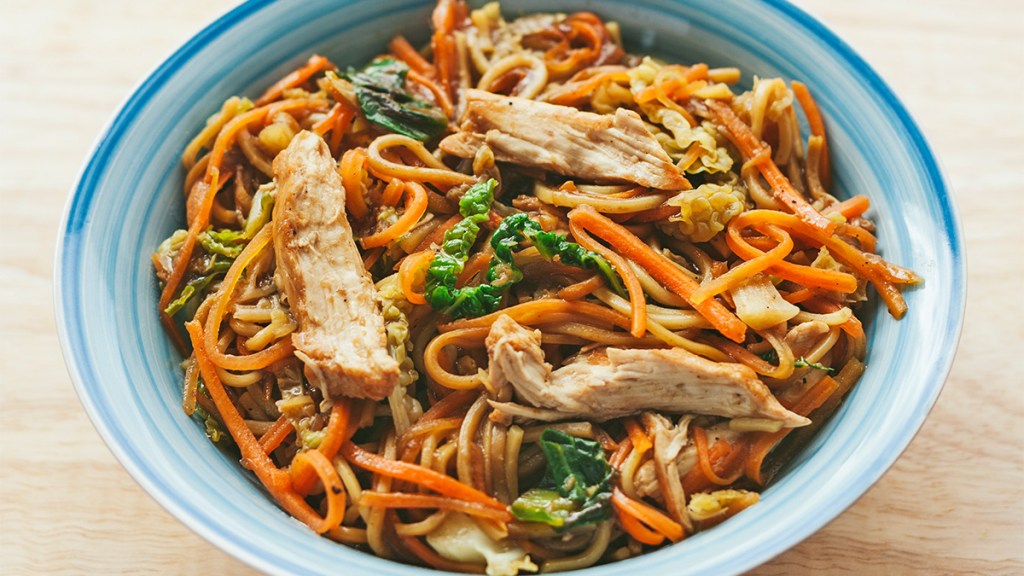
Faster than takeout — and better for you too — this tasty toss is easy to customize with any vegetables you have on hand.
Ingredients:
- 8 oz. linguine pasta
- 1 Tbs. oil
- 2 carrots, cut into sticks
- 1 rib celery, cut into 3-inch-long thin slices
- 1 (8 oz.) zucchini, cut into ½-inch-thick strips
- 1 lb. boneless, skinless chicken thighs, cut into ½-inch-wide strips
- 3 scallions, cut into 2½-inch pieces
- 2 cloves garlic, minced
- 4 tsp. grated peeled fresh ginger
- ⅓ cup teriyaki baste and glaze
- 1 tsp. sesame seeds
Directions:
- Active: 20 mins
- Total time: 35 mins
- Yield: 4 servings
- Cook pasta per package directions; drain. Return to pot.
- In nonstick skillet, heat oil over medium-high heat; add carrots and celery. Cook 4 minutes. Add zucchini; cook, stirring, until tender, 3 minutes. Remove.
- Add chicken; cook until no longer pink, 7 to 8 minutes. Add scallions, garlic and ginger; cook 1 minutes. Stir in teriyaki and ¼ cup water; cook 1 minutes.
- Add chicken mixture and vegetables to pot with linguine; toss until evenly coated. Sprinkle with sesame seeds. If desired, garnish with scallion curls.

For more tips on how to maximize your pantry staples, check out the stories
What Exactly Is a Caper + Why You Want to Have a Jar On Hand If You Love Italian Food
Whipped Butter Is the Chef’s Secret for Extra-Creamy Flavor — Easy 2-Ingredient Recipe
13 Deliciously Easy Ways to Use Up Leftover Sweetened Condensed Milk


