I Tried Hocus Pocus Buns, the Easiest of All Halloween Recipes, and Nearly Ruined Them
Somehow, they still turned out okay.
As much as I love baking in cool weather (it heats up the kitchen so I can keep the thermostat down — every little bit helps, right?), I’ll admit I’m not the best baker. I don’t have the patience to precisely measure every ingredient or read instructions twice. So, if I’m making something, it has to be easy. Hocus pocus buns fit the bill.
If you haven’t seen Disney’s Hocus Pocus – a 90s movie whose witch-centric story and big-name stars (Bette Midler and SJP) made it a Halloween viewing classic – it’s likely you call these buns something else: magic marshmallow rolls, disappearing marshmallow rolls, or resurrection rolls (they’re often eaten to celebrate Easter). Whatever you call them, they’re an ideal treat for a spooky gathering.
I discovered hocus pocus buns one night while scrolling through Facebook. “Marshmallows dipped in melted butter, then cinnamon sugar, wrapped in crescent rolls and baked,” the photo on my feed read. “They’re called hocus pocus buns because the marshmallows disappear! YUM is [an] understatement!” I couldn’t help but save the photo for later. They did look pretty good.
Trying Them Out, and Saving My Buns From Disaster
From this point forward, you have full permission to laugh at my baking skills (and the fact that this isn’t actual baking). The “recipe” required only four steps: 1) pop open a couple crescent roll cans; 2) coat marshmallows in butter and cinnamon-sugar; 3) roll them up; 4) bake. Things didn’t, however, go as planned.
That’s what happens when you don’t read directions carefully or pay attention to the ingredients. First mistake: I ripped the crescent rolls in the wrong places. Second mistake: I coated the marshmallows in a wonderful combination of cinnamon and salt instead of sugar. The Great British Bake Off‘s Paul and Prue would have ushered me out the tent flap before these buns even hit the oven.
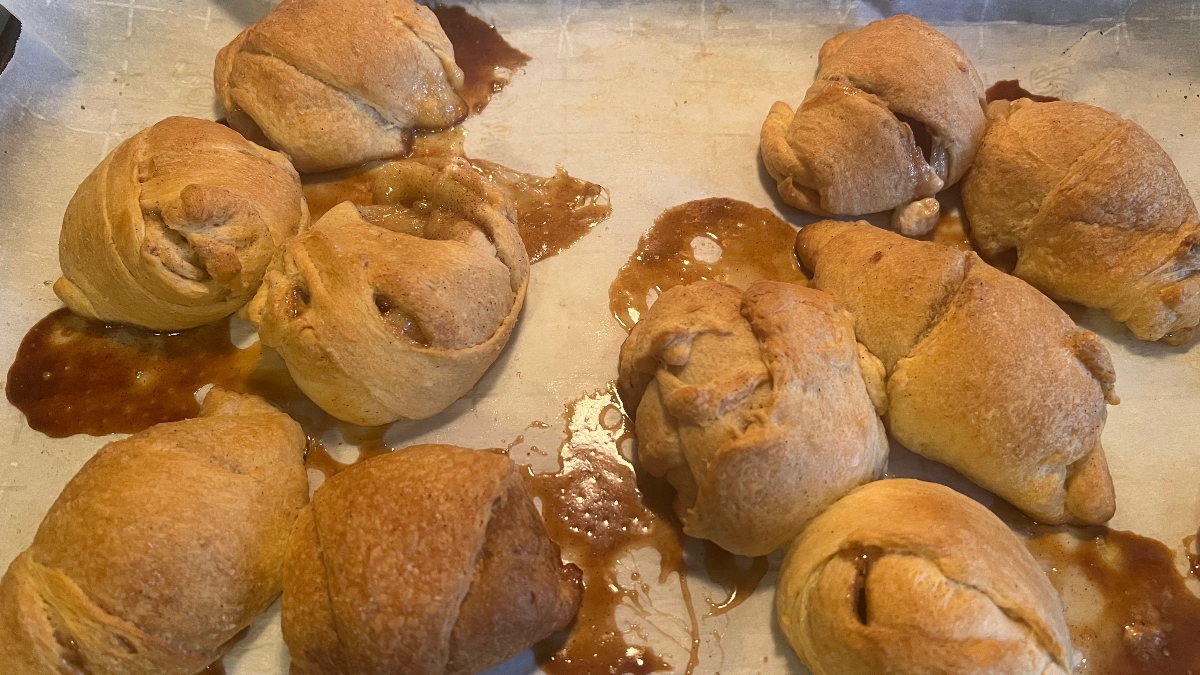
When I realized I’d mistaken the salt container for the sugar, I unrolled my sad, soggy dough, wiped off the salt as best I could, and re-rolled with new marshmallows. I tried to tuck the ends away and patch holes together so they didn’t look so hideous. Then, I popped the tray into the oven, set a timer, and tried to forget about the mini-bun massacre that had just taken place in my kitchen.
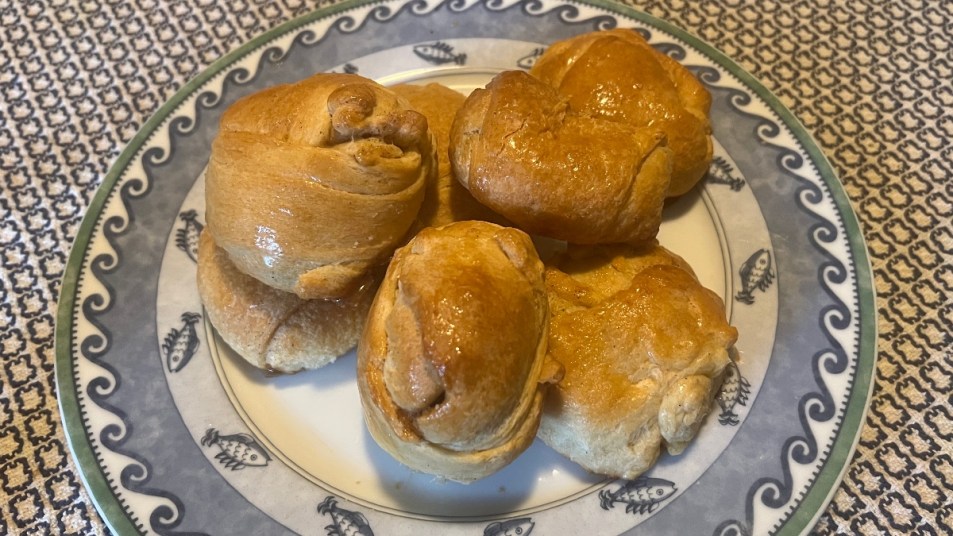
When the buns came out of the oven, some had leaked marshmallow, which then hardened into caramel-like candy. (The up side?) They looked… original.
I let the wretched things cool (the middle of these buns will burn your tongue worse than hot pizza) for about 15 minutes. When I finally tasted one, I was surprised — it was delicious, even after everything I had put it through. It was almost like a cinnamon bun, and what was left of the marshmallow in the middle was soft and gooey. Apparently, it’s hard to make hocus pocus buns taste bad.
Hocus Pocus Buns Recipe
If my buns can taste good after multiple mishaps, yours can, too. Just make sure you really seal the edges of the dough; that caramel leakage could break a tooth. Here’s what you’ll need.

Ingredients (makes 16 buns):
- 3 tablespoons granulated sugar
- 1 to 2 teaspoons cinnamon
- 3 to 4 tablespoons butter, melted
- 1 pack marshmallows
- 2 cans crescent rolls, 8 ounces each
Instructions:
- Preheat oven to 375 degrees Fahrenheit. Line baking sheet with parchment paper or foil.
- Unroll crescent rolls onto baking sheet.
- Mix cinnamon and sugar in bowl. Melt butter in separate bowl.
- Dip marshmallow in butter, coat in cinnamon-sugar. Place in middle of crescent roll, roll up. Press edges together. Dip bottom of bun in butter to prevent sticking.
- Repeat step 4 for all buns. Place on baking sheet.
- Bake 10 to 12 minutes or until golden brown. Remove and coat with remaining melted butter. Dust with remaining cinnamon-sugar, if preferred.
Ready to try these ooey-gooey creations yourself? Hopefully, you won’t make the same mistakes I did. Let me know how they turn out!
This article was updated on October 11, 2022.


