10 Easy Braids for Thin Hair That Make Hair Look Thicker Instantly
Celebrity hairstylists spill their best braids and tips — most can be done in under five minutes!
Braided hairstyles are all over social media these days, and if you’re like us, you might be tempted to try one or two out. But the only thing holding us back from fashioning our hair into a braid? Worrying the style will make our already thin hair look even thinner. But we needn’t let that worry hold us back, say the celebrity hairstylists we talked to, who all agreed that braids for thin hair can be a boon to women 40 and older — offering benefits like lifting facial features and making thin hair appear more lush in an instant. It all comes down to the style you choose and the techniques used to create braids.
While it is true that certain braids such as box braids, can make hair look thinner, other styles, like dutch braids and bubble braids work well for thin hair. Even better, some braided hairstyles can actually make hair look thicker and more youthful, says Samantha Denis, a former hairstylist and founder of allyoos hair care. All you need is a little insider know-how to make braids for thin hair work — so keep scrolling for just that! (Click through to see more tricks about how to style thinning hair.)
4 hairstylist secrets to creating braids for thin hair
1. Take care to not pull hair too tight
“First, remember when styling thin or fine hair, you never want to overly tighten or pull on the hair while braiding,” cautions celebrity hairstylist Cesar DeLeon Ramirez. That means try to keep a relaxed hold while you’re braiding, otherwise you’ll can create too much tension, which can cause hair to fall out. “It’s also essential to keep braids from getting too heavy,” he adds. “As that can pull at the roots and cause even more breakage.”
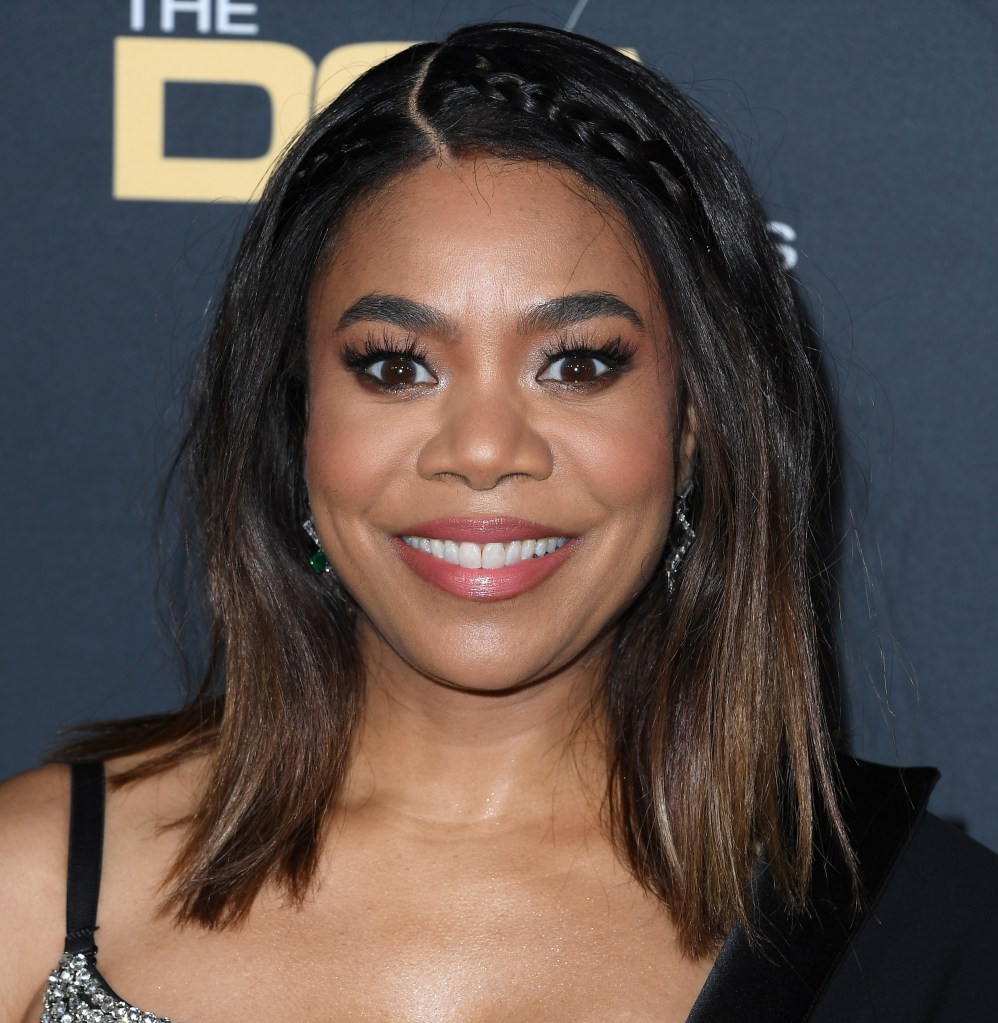
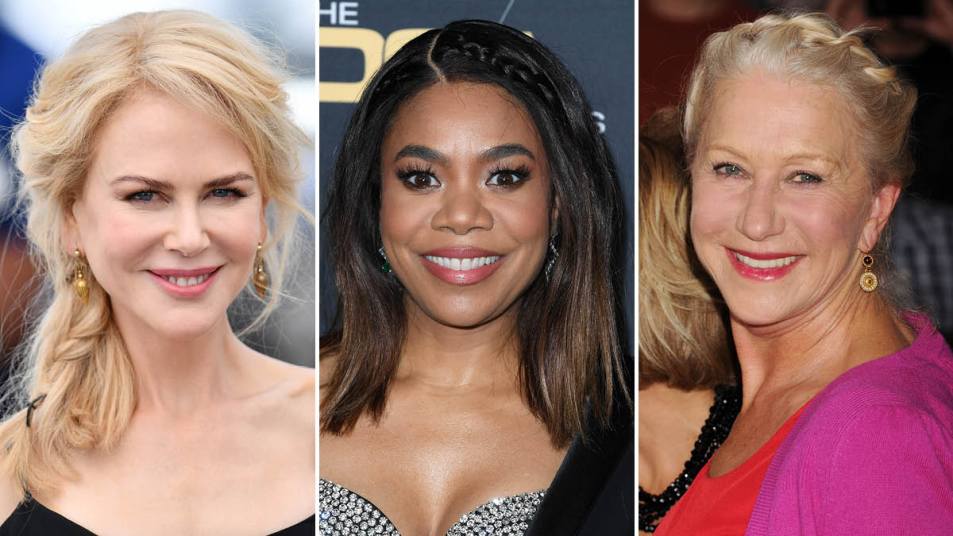
Adding small braids into hair that’s been left down like Regina Hall did above can cleverly conceal thinning areas.
2. Bulk up braids for thin hair with ‘pancaking’
A technique called “pancaking” can make all the difference when it comes to braids for thin hair. It’s a hairstylist trick that flattens braids so they look wider, resembling a pancake.
To do: Begin by braiding your hair — if possible, try not to tie off your braid before trying this technique, or at least leave an inch of hair unbraided at the bottom, just above the hair tie. Once starting at the bottom of the braid, gently tug the outer loops of each braid. If you have a hard time picturing this, check out the below video from TikToker Johanna Westbrook, who says the trick is to not pull out too much hair. Work your way up, taking care to pull only on the outside loops, and make them evenly sized.
@johannawestbrook How to pancake your braids! EVEN WORKS WITH THIN HAIR!!!!
♬ original sound – Kyle & Jackie O
3. Prep hair with the right products
Since thinner hair can have some slip to it, giving strands more grip so they can hold a braid is important — and so is using the right product. As it turns out, when it comes to braids for thin hair, you actually want to avoid some of the products that are labeled for “braids” when braiding hair. “When doing any braided style, avoid using heavy waxes, pastes and gels,” cautions Ramirez. “These products weigh the hair down and make the hair look so much thinner.” Instead, the pros we talked to suggest using products like hair fillers, hydrating leave-in conditioners or hair oils as you’ll see in their how-tos below.
4. Keep a comb nearby
For the final hairstylist trick: It’s best to have a wide-tooth comb with a rat tail end close at hand when creating braids for thin hair. “The wide teeth will avoid putting excessive stress on thinning hair,” says Denis. “And the pointed end will help to neatly section off hair.”

A subtle braid like Nicole Kidman’s above adds interest to a side ponytail so it doesn’t look one-dimensional or make already thin hair appear thinner.
The 10 best braids for thin hair
Now armed with all that knowledge, you’re ready to try your hand at creating braids for thin hair. Read on for the 10 types and simple how-tos that will work wonders to make hair appear thicker and fuller instantly.
1. Gorgeous triple braid
You’ve heard the old saying “three heads are better than one” — well, it applies to braids as well. “For a foolproof way to make hair look super thick, try what I call the weaving method,” says Ramirez. “That’s basically weaving three braids into one, which adds so much natural fullness and couldn’t be easier.” Check out this quick tutorial from @AnisaSojka on Youtube to see that it’s truly as simple as 1-2-3!
To do:
- Brush hair and secure with an elastic into either a high or low ponytail. Then evenly split the hair in the tail into three sections.
- Braid each section into a basic braid by dividing it into three strands. Start with the left strand and place it in the middle. Then grab the right strand and place it over the original strand, so it’s now in the middle. Keep repeating the pattern until you reach the end of hair; secure each braid with an elastic.
- Once you end up with three equal-sized braids, be sure to ‘pancake’ each braid. Finish by braiding the three braids into one thick braid; secure with an elastic.
2. Chic, classic French braids for thin hair
The ideal hair length for a French braid, which can also strategically help cover any sparse spots, is hair that’s shoulder-length or longer. “French braids can help fine hair look so much fuller,” says Denis, who advises to lightly tease hair before braiding “so it stands up more.” Since this timeless style can be a bit difficult to master, take a look at this tutorial from YouTuber @EveryDayHairInspiration.
To do:
- At your hairline, gather the top layer of hair into a triangular section from just above your temples back toward the crown. Then separate this section into three smaller sections. Start the braid by taking a section of hair closest to the left temple and crossing it to the center, then repeat on the right side.
- Starting on the left again, take a half inch of the loose hair on each side and add it to the section of hair you are holding before crossing it over. Continue braiding, adding a half inch of loose hair into the braid on each side as you go down the length of hair.
- Once you reach the bottom, secure it with an elastic. Use the tail or your comb to “fluff” up hair so it looks like more hair is stacked underneath the braid.
3. Fancy fishtail braid
Fishtail braids help to disguise thinning hair and hide bare spots on the scalp. “A fishtail can be super flattering for finer hair textures,” says Denis. “The key is to start with dry hair, teased just a bit at the hairline, crown and on the sides, and gingerly combed back into a fishtail braid for a fuller effect.” If the how-to seems tricky at first, follow along with Youtuber Kayley Melissa’s easy tutorial.
To do:
- Part your hair into two sections, divided evenly. Pick up a small piece of hair from the outer edge of one side of the divided hair and transfer it to the inner part of the other side. Then take a small piece of hair from the outer edge of the section of hair opposite from the side you started on. Transfer it to the inner edge of the other side of hair.
- Repeat the process until you get to the bottom of hair, then secure with an elastic.
- Next, use the tail of your comb to fluff up sections of the fishtail to make it look even fuller. Spritz with hairspray to set.
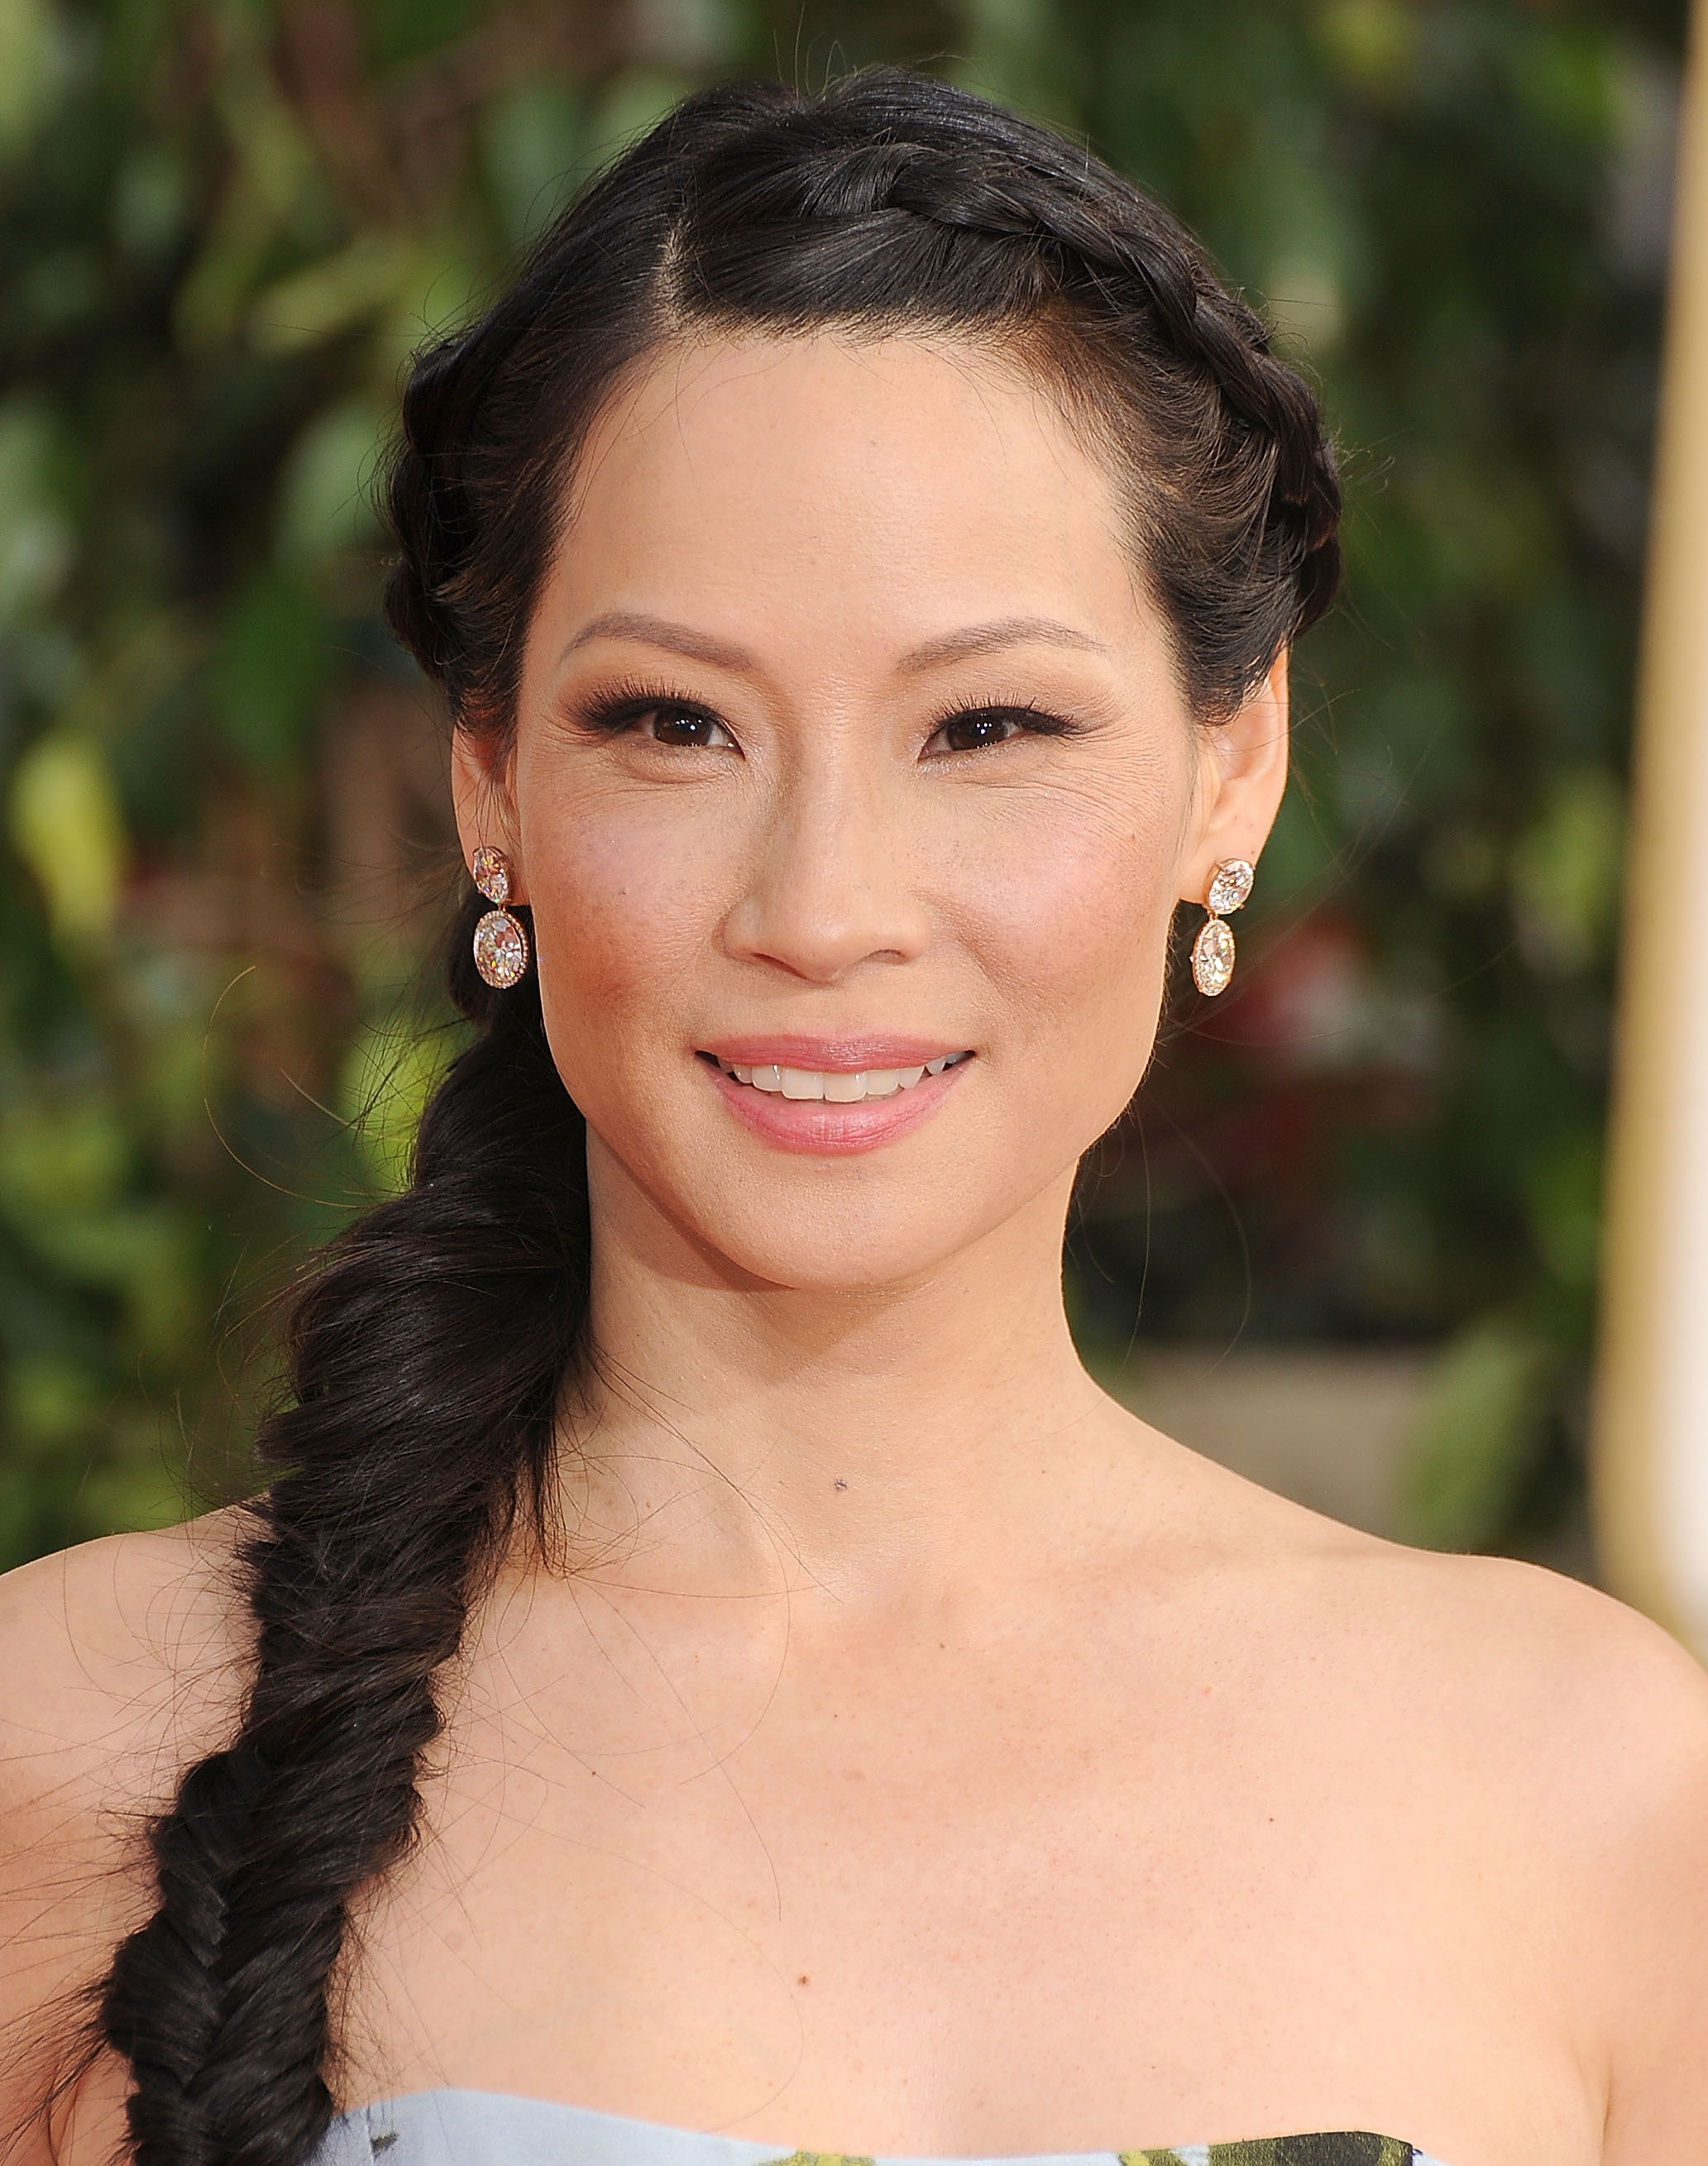
A fishtail braid and French braid combo as shown on Lucy Liu above gives thin hair added depth and dimension.
4. Volumizing Dutch braids for thin hair
This style of braid sits over the hair, so it often looks fuller than other types of braids. Best yet, it’s one of the styles that can work with chin-length hair or longer. Of course, there are ways to make it look even fuller than usual, like the tip hairstylist @GlamGirlGabi shares on her Youtube channel: Start the braid by parting your hair deeper, or a few inches over from your natural part, to infuse the braid with the illusion of more fullness. The reason for doing this, she explains in the video below, is to get as much hair as you can into a Dutch braid to fan it out and make it appear extra thick.
To do:
- Take a 3-inch section of hair and divide it equally into three parts. Then take the front section and pass it under the middle section so that the front becomes the middle and the middle becomes the front. Next take your back section and pass it under the middle.
- Grab a small section of hair from near your hairline, and add it into that front section. Pass the front under the middle again. Now gather hair near the back section of your hair and add the hair into that back section. Pass the back section under the middle section again. Repeat this process until you run out of hair. Then either secure it with an elastic or with bobby pins under the hair at the back of your head.
- Use the pancaking method to widen the Dutch braid so it (and hair) looks fuller.
5. Pretty crown or ‘milkmaid’ braid
Crown braids not only add some feminine flair to your look, but they also beautifully frame the face. “A crown braid with a middle part allows equal amounts of volume on each side, which won’t put too much pressure on thin hair,” says Ramirez. “I like to use a hair filler between braids so hair looks fuller, while also giving the hair some grip, which is especially useful when using the pancake method.” Try one like Toppik Hair Filler (Buy from Ulta, $24.95; available in four shades) that is made with electro-statically charged keratin fibers — the same proteins found in hair — that stick to strands. Check out this tutorial from Youtube @SashaWichita for a visual on how to easily create milkmaid braids.
To do:
- Part your hair down the middle and separate each side into even sections. Apply hair filler to each side. Then braid each side and secure with an elastic.
- Be sure to use the pancake method on each braid. Add more hair filler as needed to bulk up hair even more or fill in sparse spots on the scalp.
- Take the braid on the right side and wrap it around your head like a headband. Secure it in place with bobby pins. Do the same with the braid on the left. Twist each braid’s end around the other to blend, and then secure in place with bobby pins.
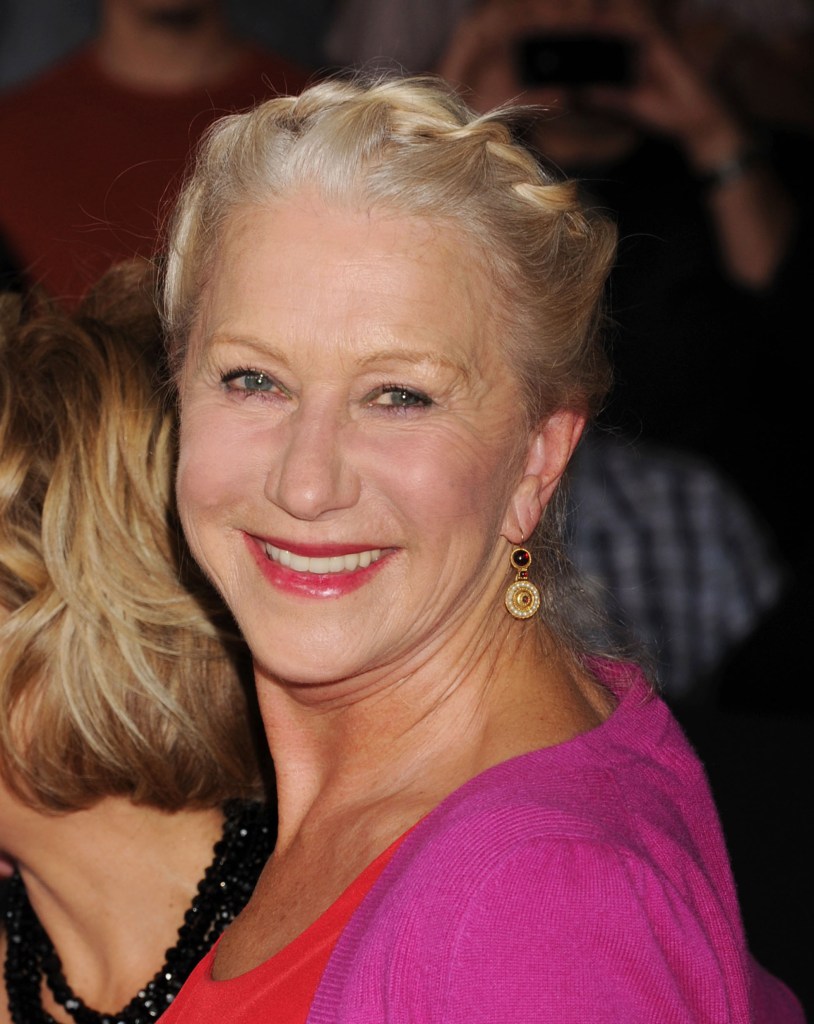
A crown and Dutch braid hybrid as seen on Helen Mirren above “bulks up” fine, thin hair.
6. Relaxed rope braids for thin hair
“Styles like side-swept rope braids can amp up hair’s volume and are universally flattering for everyone,” says Denis. A rope braid works best on hair that hasn’t been washed for a day or two, since this gives hair more grip that keeps the looser style in place. Even better? This type of braid can be completed in under 60 seconds, just like Youtuber @LaineyMarieBeauty proved in the video below where she timed herself pulling off the look in under a minute — 54 seconds to be exact!
To do:
- Take two sections of hair up at the top of the head. Add in hair to each section, twist the sections around each other, add in hair, and twist again. Grab hair next to each twist as you go.
- Once you get to the ear, divide the rest of hair into two equal parts and incorporate it in with the hair from the front rope braid. Twist the sections away from your face, and take the back section and cross it over the front. Once more, twist the sections away from the face, and cross the back section over the front. Repeat until you run out of hair to twist; secure with an elastic.
- Finish by sticking some bobby pins into the twist to secure it. Spritz with hairspray to set.
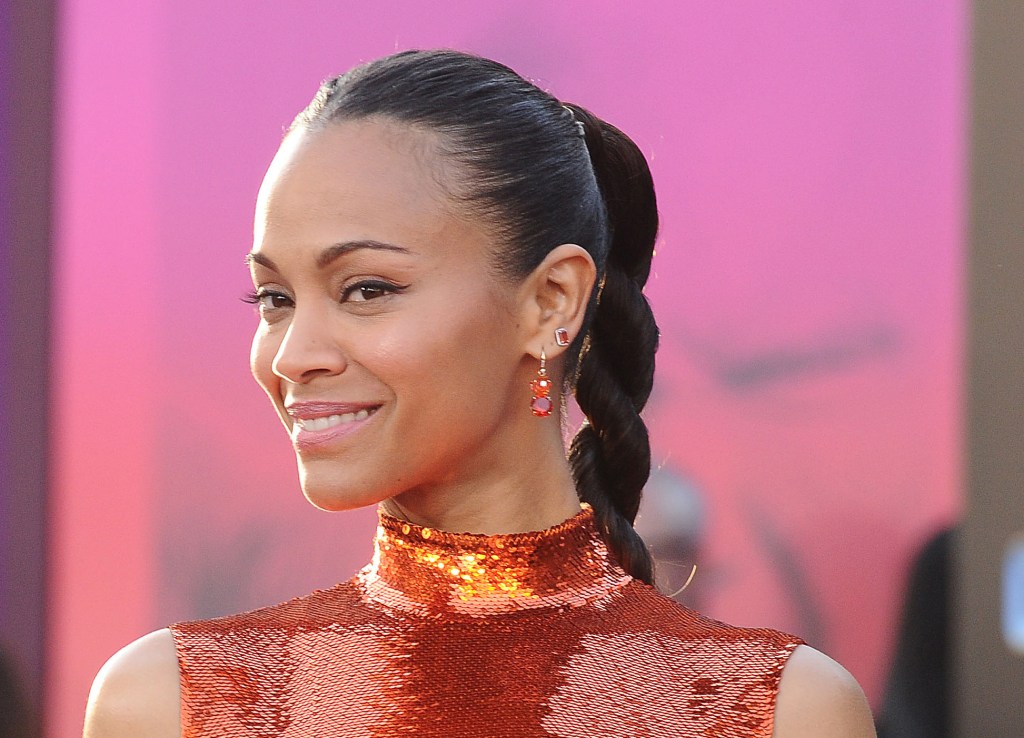
A rope braid can also be created with a sleek high ponytail as shown on Zoe Saldana above.
7. Easy-peasy pull-through braid
Spice up a traditional braid and give hair va-va volume, with a simple to achieve pull-through braid. This style might look like it takes a lot of effort, but it couldn’t be easier, as TikToker @chelseygobbo illustrates in her quick how-to video below. The braided effect is actually an illusion, since this style is really made up of several intertwining ponytails.
@chelseygobbo #easyhairstylesforspring #springhairstyleideas #bohobraidstyle #hairstyleforthickhair #pullthroughbraids #braidhairstylewithlayering
♬ original sound – Chelsey G
To do:
- Take the top layer of hair from ear to ear and secure into a high ponytail at the crown of the head. Grab a small horizontal section of hair underneath the first ponytail and secure into a second ponytail with an elastic.
- Separate the top ponytail into two equal segments, then pull the bottom ponytail through the center and clip up the tail. Then, reach through the middle of the top section and grab the bottom section, pulling it through the center. Next, grab another loose small section of hair and incorporate it with the two halves of the first ponytail and secure with a hair tie.
- Unclip the second ponytail and continue creating more ponytails, following steps one and two, until you reach the ends of hair. Finish by using the pancaking method to create more volume in each loop and set the look with hairspray.
8. Beautiful braided bun
Wrapping a braid up into a bun can make you look like you have a mass of hair, even if you don’t. Using the pancaking method before securing the bun will help achieve this effect. “The smoother and shinier the hair, the prettier a braided bun will look,” says Denis. “Use a leave-in hair mask anytime you are slicking your hair into a braided bun — you’ll be treating your hair while helping add dimension for thicker, healthier looking hair.” For a visual, watch this video from @missysueblog on Instagram.
To do:
- Apply a nickel-size amount of a leave-in conditioning mask, like the allyoos Juice Drench Hair Mask (Buy from allyoos, $30) through slightly damp hair. Then pull hair into a low ponytail and secure it with an elastic. Next, braid hair and secure the bottom with an elastic.
- Wrap the braid into a bun at the back of the head; tuck the end of the braid back at the ponytail base and secure in place with bobby pins.
- Gently tug on the edges of the bun out to create a fuller effect.
9. Polished ribbon braid for thin hair
“A ribbon braid makes hair look polished and put together as it thickens up thin locks,” says celebrity hairstylist Clemence Dol. The style takes very minimal effort, as shown in the video below from @EveryDayHairInspiration on YouTube. Tip: Using a leave-in conditioner can add some much-needed hydration, since mature hair is often in need of moisture. “You’ll add shine to liven up lifeless-looking locks and also ease flyaways and frizz,” he says. “Most of my clients are so surprised that something so simple — like adding a bit of ribbon to a braid — can instantly freshen up their look.” Even better? Infusing a braid with an eye-catching ribbon takes attention away from any sparse spots.
To do:
- Start by working a nickel-size amount of a leave-in conditioner, like Vegamour HYDR-8 Leave-In Conditioner (Buy from Vegamour, $16) through hair. Then secure hair into a ponytail with an elastic. Be sure to use two different colored ribbons so they won’t get mixed up in the braid. (Tip: You want to make sure the ribbons are a little longer than your hair length.) Tie the ribbons together and then loop the knot under the elastic around the ponytail.
- Split the hair of the tail into three separate sections. Take the ribbons in your hands as well, so you have five sections. Take the section of hair all the way to the left and cross it under the first strand of hair, then over the first ribbon and under the second ribbon.
- Next grab the section of hair all the way to the right and cross it over the first strand of hair, then under the second ribbon, and over the first ribbon. Now take the left strand again and cross it under the first strand, then over the first ribbon and under the second ribbon. Repeat the process until you get to the bottom of the hair; secure it with an elastic.
10. Playful bubble braid
Bubble braids not only make you look like you have double the amount of hair, they are also a more modern twist on a classic braid. Before you think this style looks too intricate, it can actually be done in under a minute! Just check out how speedily TikToker @Hallesoswag creates her bubble braids in the video below. (Click through to see more bubble braid hairstyles.)
@hallesoswag my favorite quick and easy updo
♬ VIBE WITH SPENCE – Phillygoatspence🐐
To do:
- Secure hair into a high ponytail with an elastic, then lightly tease the hair in the tail.
- Use another elastic to tie hair 1 to 2 inches below the base of the ponytail. Continue to evenly space the elastics until you reach the ends of hair.
- Shape the “bubbles” by gently tugging on the segments of hair between the elastics to make them more voluminous — or use the tail of a comb to puff hair out a bit. Set with hairspray.
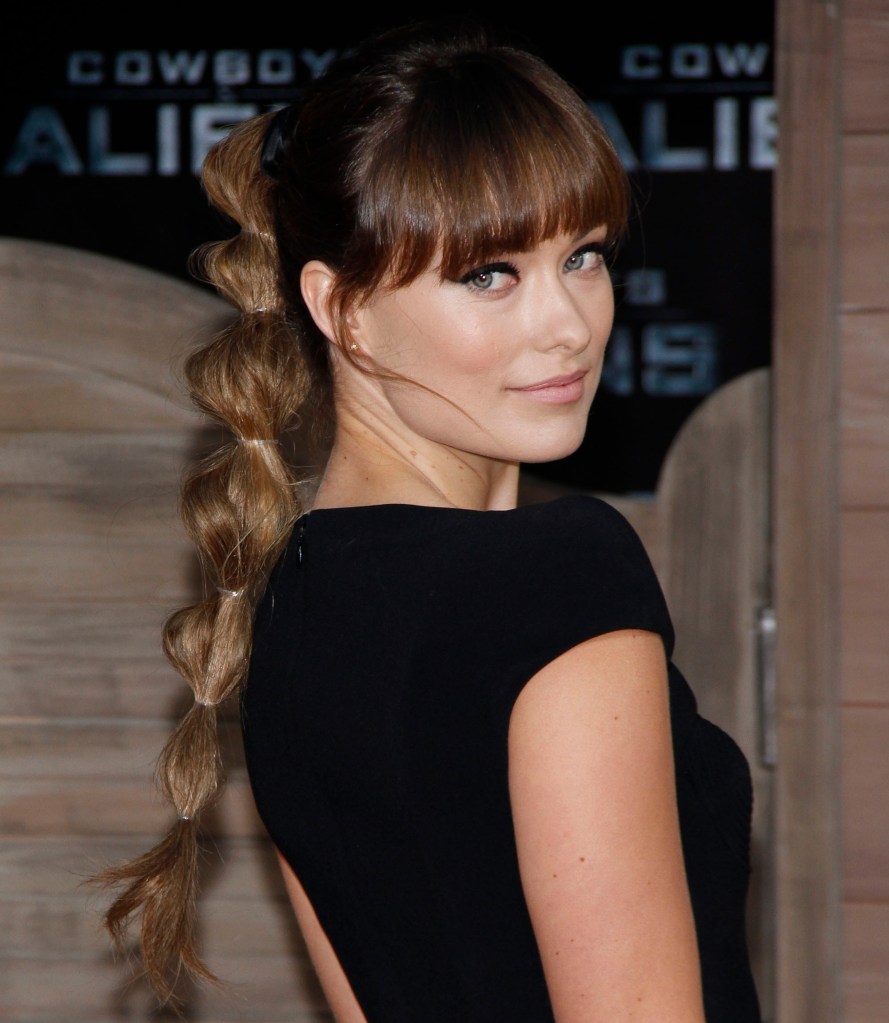
And the bubble-like segments of hair that make up a bubble braid as seen on Olivia Wilde above creates visual bulk to a thinner mane.
With so many braids for thin hair to choose from, it’s a breeze to try a few — or even all of them — and add your favorites to your hair styling arsenal!

For more tips and tricks to achieving thick, gorgeous hair, click through these stories:
5 Dyson Airwrap Dupes: Dry and Style Hair At The Same Time For $100s Less
The 10 Best Haircuts For Thin Hair That Make Hair Look Fuller from Every Angle
8 Bang Styles That Conceal a Receding Hairline + Make Hair Look Thicker


