DIY Dessert: Get Winter Cozy by Making Your Own Marshmallows
They're softer and more pillowy than the store-bought variety.
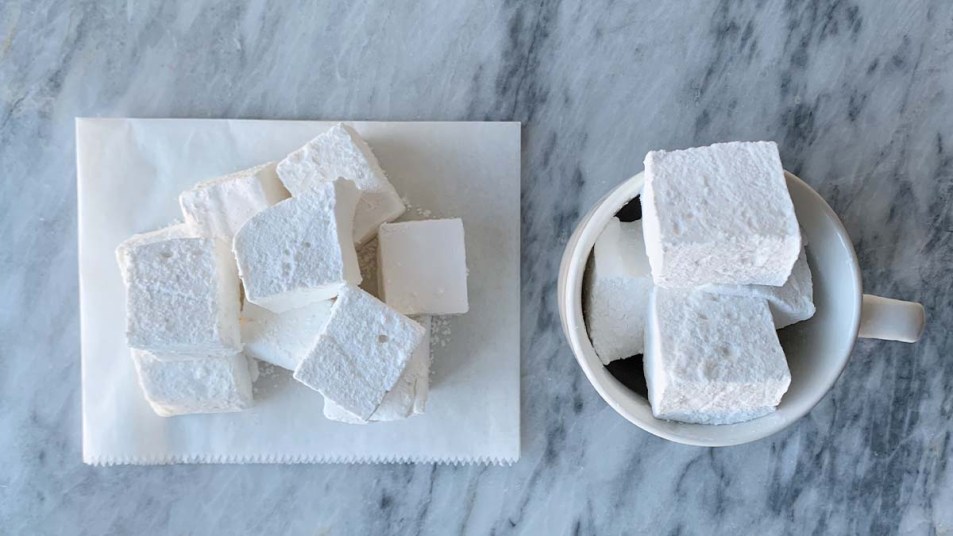
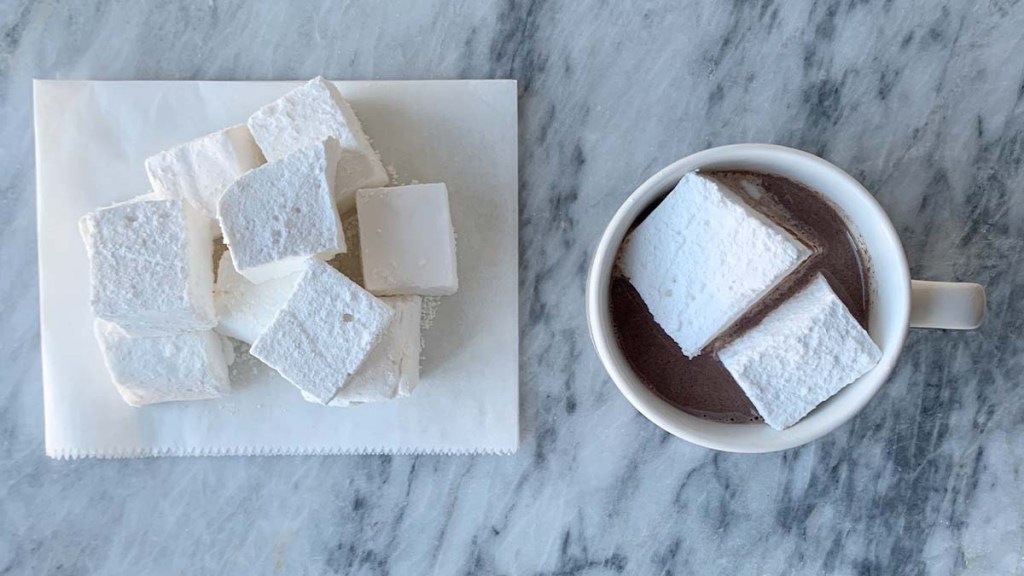
A mug of hot chocolate just doesn’t feel right without a handful of marshmallows sprinkled on top. These sugar-filled morsels balance out the drink’s rich, chocolatey flavor. But while you can easily buy jumbo or mini marshmallows from the store, we think your holiday hot cocoa deserves better. Making your own marshmallows means you can flavor, color, and shape them as you wish. Most recipes use pantry staples like vanilla extract, sugar, and light corn syrup — so you probably won’t even have to grab extra ingredients from the store. Keep reading if you want make the holidays even more special this year by making homemade marshmallows.
Why You Should Make Your Own Marshmallows
Homemade marshmallows require both effort and time, but they’re completely worth it. Here are three reasons why you should ditch the store-bought kind and make yours from scratch:
- Homemade marshmallows are super fluffy. If you think you’re missing out on pillowy marshmallows by making them yourself, think again. Homemade marshmallows are just as soft and springy as the commercial kind. Plus, they have a sugary, vanilla flavor that doesn’t taste like it’s been processed. This makes them a perfect topping for your cup of hot cocoa or gingerbread house.
- Store-bought marshmallows contain unhealthy ingredients. Commercial marshmallows typically contain artificial flavors and preservatives in high quantities. This helps extend the shelf life of the marshmallows, but it makes them an unhealthy treat. Making marshmallows from scratch is a better option, as it allows you to control the ingredients.
- It’s a fun DIY project for kids. Making marshmallows with your little one is fun, especially because you can create festive designs using snowman- or tree-shaped cookie cutters. Although the batter needs to rest for several hours, marshmallows can be prepared in the morning to enjoy after dinner. Your kid or grandkid will likely be thrilled about making a treat they often see at the store with their own hands.
How To Make Homemade Marshmallows

Without further ado, here’s a basic recipe for delicious homemade marshmallows from TheCookingFoodie.com. These marshmallows will last up to two weeks if stored in an airtight container at room temperature.
Ingredients:
- 3 envelopes unflavored gelatin powder + ½ cup cold water
- 1½ cups sugar
- 1¼ cups light corn syrup
- ½ cup water
- ¼ teaspoon salt
- 2 teaspoons vanilla extract
- Food gel coloring (optional)
- Vegetable oil for greasing
For dusting:
- ½ cup powdered sugar
- ½ cup cornstarch
Tools:
- Electric mixer
- Candy thermometer
- One 9-by-9-inch pan
- Offset spatula
- Fine mesh sieve
Directions:
- Prep: 30 mins
- Rest: 6 hours
- Total time: 6 hours 30 mins
- Yield: 20 marshmallows
- Line 9-by-9-inch pan with parchment paper, plastic wrap, or foil. Lightly oil and set aside.
- In bowl of electric mixer, sprinkle gelatin over ½ cup cold water. Let bloom about 15 minutes.
- Meanwhile, combine sugar, salt corn syrup, and ½ cup water in a small saucepan, whisking only until sugar is dissolved. Bring the mixture to boil, until candy thermometer reads 240 degrees Fahrenheit. Do not stir while mixture is cooking.
- Turn on your mixer to low-medium speed, add vanilla extract and whisk bloomed gelatin for 30 seconds, then carefully pour hot sugar syrup down side of bowl into gelatin. When all syrup has been added, increase the speed to high and whip about 10 minutes (add food coloring if desired), until thick and fluffy.
- Immediately pour into prepared pan, and spread evenly with oiled offset spatula. Let sit at least 6 hours at room temperature.
- Make the dusting mixture: Combine powdered sugar and cornstarch in bowl. Use fine mesh sieve for distributing mixture in next step.
- Sprinkle top of the cured marshmallows with some dusting mixture, then sprinkle cutting surface very generously with dusting mixture. Flip block of marshmallows out onto your working surface. Oil and dust big sharp knife with dusting mixture and cut the marshmallow into squares. (Or use cookie cutters at this stage for cutting out fun patterns.)
- Toss each marshmallow in dusting mixture so all sides are evenly coated. Enjoy.
My Taste Test
These marshmallows’ light, bouncy texture is what I’d imagine a cloud tastes like. The sugar and corn syrup give the marshmallows a saccharine flavor that isn’t overpowering, thanks to the vanilla extract’s aromatic taste. This pairs well with the intensity of the Mexican hot chocolate I served my own marshmallows with. I’ll admit that I usually only eat marshmallows during the holidays, when I’m making hot cocoa or Rice Krispie treats. But whipping up these morsels from scratch will help me impress every house guest for the rest of this season.