This Healthy Homemade Snack Will Add a Satisfying Crunch to Your Favorite Meals

Dreaming of a crunchy salad topper, smoothie enhancer, or granola add-in all in one? Puffed quinoa is the way to go. This simple and delicious snack takes all the difficulty out of cooking with quinoa — all you need is a stovetop and a flat pan.
When I first heard about puffed quinoa (or popped quinoa), I was skeptical. Boiled quinoa usually takes between 20 and 30 minutes to cook on the stovetop, and there are no guarantees on how it will turn out. This ancient grain is finicky, and I’m always testing out different methods to make it light and fluffy and avoid that mushy texture. But once I used this quick and mess-free method to create a crunchy snack, I couldn’t have been more excited.
Unlike stovetop popcorn, puffed quinoa needs no oil. That means you’re avoiding 28 grams of added fat and 248 additional calories (from the two tablespoons of oil you need to make popcorn). Puffed quinoa also packs a punch in terms of nutrition. About 2/3 of a cup contains 7 grams of protein, 3 grams of fiber, and 20 milligrams of calcium. Ready to test out this snack for yourself? Let’s get popping!
How to Make Puffed Quinoa
To try out puffed quinoa for myself, all I used was a flat saucepan. I turned the stovetop up to medium heat on my electric stove, though I’d recommend using low heat on a gas stove. Then, I poured out about 1/4 cup of dry quinoa and waited for the pan to heat.
When the pan was nice and hot, I poured in the quinoa. I was worried about tiny pieces of grain flying around the kitchen, so I covered the pan with a grease splatter screen (Buy on Amazon, $10.99). But as the quinoa began to pop, I realized the screen wasn’t necessary. The tiny grains snapped and crackled but barely lifted off the base of the pan.
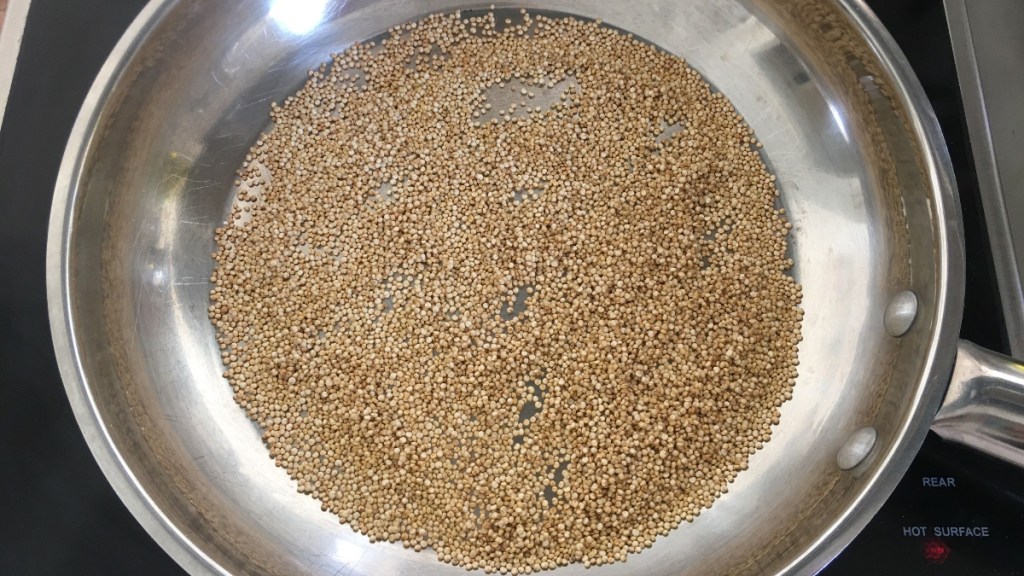
The snapping and popping sounds were very pleasing! It wasn’t nearly as loud as popcorn kernels, though it did smell a bit like popcorn cooking. I waited for the pops to stop or slow down, but I couldn’t quite tell when the quinoa was done. I didn’t want to crunch on hard, uncooked grains. The first batch turned dark brown before I took it off the heat. Oops!

I tried again with a smaller batch of quinoa so that the grains could evenly spread across the pan. I watched the pan carefully, stirred the grains occasionally, and took them off the heat before all the popping and cracking stopped. This time, the quinoa had a more appealing, toasty brown color.
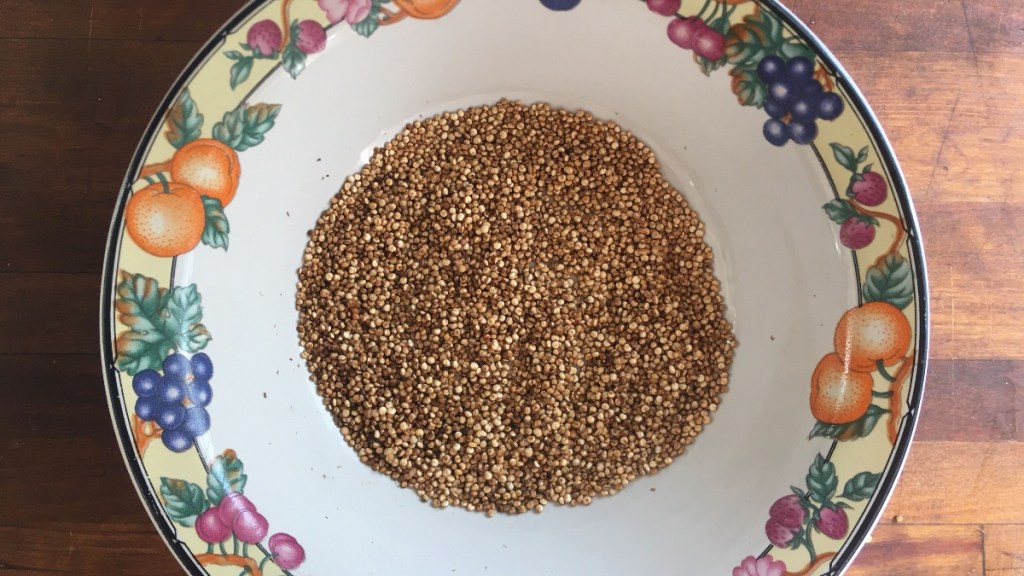
When I tried it, I was pleasantly surprised. The quinoa had a great crunch and a flavor that mildly resembled popcorn. I was nervous about crunching down on uncooked kernels, but it all seemed to have popped evenly. Better yet, the pan needed only a simple rinse to clean.
If you are making puffed quinoa at home, check the label on the bag. You may need to wash and dry it first to remove any residue or tiny rocks. I skipped this step because the brand I used claimed it was “washed and ready.” But, it’s always a good idea to wash your quinoa if you’re unsure. To dry it out quickly, some chefs recommend spreading the grains onto a cookie sheet and letting them sit in the oven on the lowest temperature with the oven door open, for about 30 minutes.
From here, the opportunities with puffed quinoa are endless. Sprinkle them on your avocado toast, toss them on top of your morning yogurt, or mix them into your granola. You’ll never want to go back to life without them!


