Snack Battle Winner: Did My Homemade Cheez-Its Recipe Taste Better Than the Store-Bought Version?
A head-to-head battle to see which cheesy cracker reigns supreme.
Cheez-Its always remind me of my childhood. The sharp orange crackers were a staple snack in my lunch box, and their crunchy texture and light salting made me feel like one bag was never enough. While my desire to eat Cheez-Its every day lessened with age, they’re still a nostalgic treat I enjoy every now and then. With National Snack Day approaching this week (it’s March 4), I decided to revisit my love for Cheez-Its with a fun snack battle: a two-ingredient homemade version versus the store-bought kind. See which one reigned supreme below. (Spoiler: The results may not be much of a surprise!)
How Commercial Cheez-Its are Made
Before recreating this snack at home, let’s review the history of the legendary Cheez-It. Cheez-Its are 102 years old, having been introduced to the world in 1921 by an Ohio-based snack cracker manufacturer called the Green and Green Company. The standard version of these cheesy squares contains cheddar cheese, skim milk, yeast, salt, and paprika. You can also find upgraded versions that feature a Buffalo wing or Pepper Jack cheese flavor.
Though mass produced, making store-bought Cheez-Its is actually a complex process that involves mixing dough, letting it rise for a day, and rolling it into thin sheets; then baking the cracker sheets, cutting them into squares, and punching out a hole in the center. (It’s the last step that gives Cheez-Its their signature appearance.) Watch the video below to see the process of turning grated cheese into Cheez-It crackers first-hand.
How To Make 2-Ingredient Cheez-Its At Home
You can buy Cheez-Its are, of course, but making them at home is shockingly simple. TikToker Meg Quinn (@ainttooproudtomeg) demonstrates how, using only sliced cheese and salt.
- Stack desired quantity of thin cheddar cheese slices, and cut stack into four even squares.
- On a baking sheet lined with parchment paper, place cheese squares in a single layer. Use a straw to punch a hole in the center of each square.
- Bake cheese squares at 275 degrees Fahrenheit 25 minutes, or until squares are crispy and golden brown.
- Remove cheese squares from oven and allow to cool 10 minutes. Sprinkle crackers with your favorite salt and enjoy.
@ainttooproudtomeg @grazinthroughlife ‘s 2 INGREDIENT cheezeits. Viral Review PART 7. #cheese #learnfromme #foodtok #keto #ketodiet
♬ Monkeys Spinning Monkeys – Kevin MacLeod & Kevin The Monkey
My Taste Test
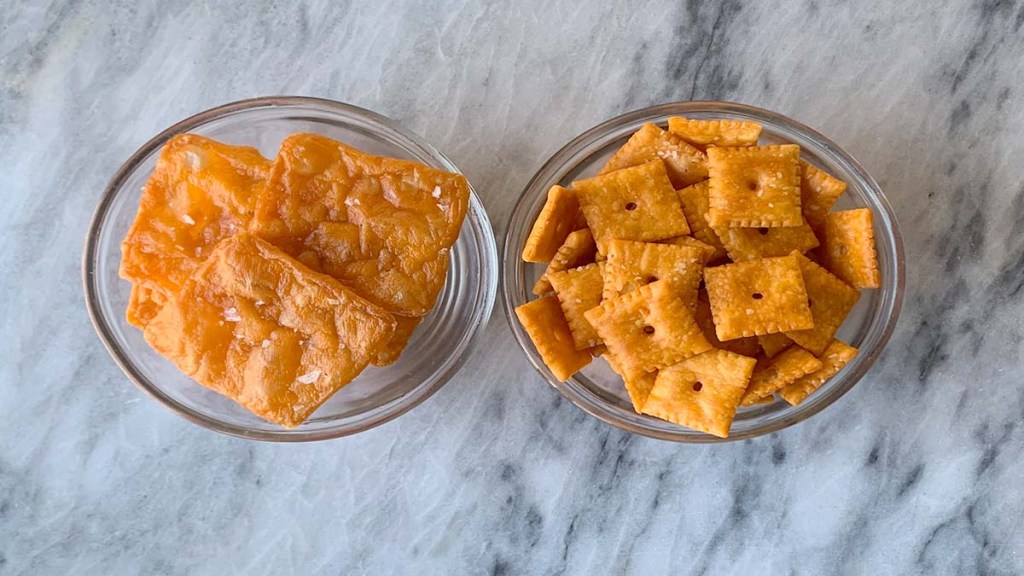
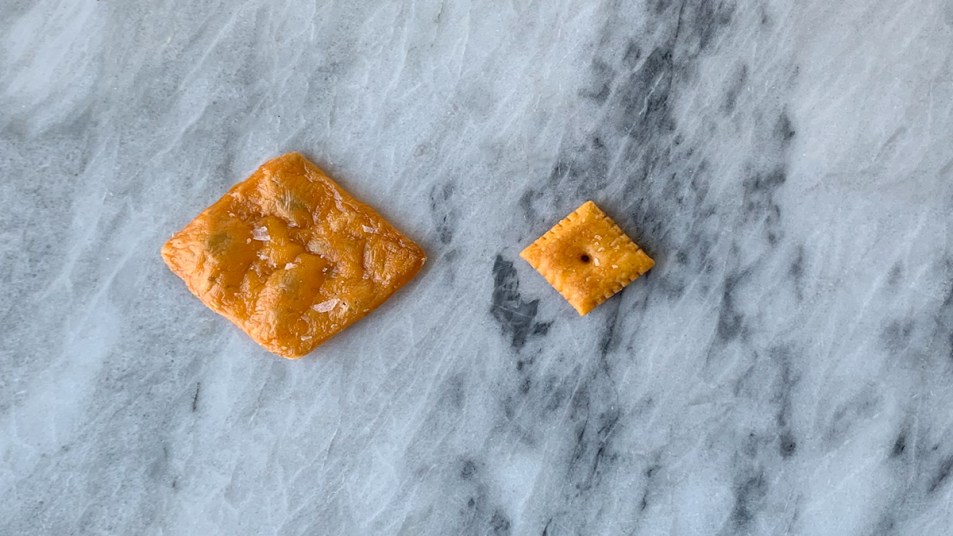
For this taste test, I compared the homemade Cheez-Its to the store-bought kind based on the crackers’ cheesiness, crispiness, and appearance. Here’s how they they stacked up against each other:
- Cheesiness: The homemade crackers had an intense cheesy flavor because the cheddar slices were the primary ingredient. By contrast, the store-bought crackers had a less tangy flavor.
- Crispiness: Both crackers were equally crunchy; however, the commercial kind often left crumbs behind after each bite — similar to a saltine or oyster cracker.
- Appearance: The ready-made version was much smaller in comparison to the homemade variety. The hole in the center of the homemade crackers also closed during the baking process, which probably happened because they lacked a leavening agent (like flour) to stabilize it.
My verdict: The store-bought Cheez-its won over the two-ingredient kind! I gave the original variety the edge because of its well-rounded cheesy flavor and portable size, which makes it ideal for snacking.
Although the commercial Cheez-its took the crown in this snack battle, I wouldn’t dismiss the homemade version entirely. It’s a simple, less-processed version of a popular after-school treat to make with and for kids. So, grab some cheese slices and decide whether this version measures up to the Cheez-its you know and love yourself.