Women Are Wearing Temporary Tattoos Like Jewelry — Here’s How to Get the Look
Temporary tattoo artists weigh in on how to get beautiful, realistic designs
If you’ve ever considered getting a tattoo (or already have one) you know it can be a daunting decision. While we love the idea of having a beautiful, permanent work of art displayed on our skin, the life-long commitment, the discomfort — eek needles! — and the cost often keep us from taking the plunge. For many, it’s much easier to take a style risk with hair color or makeup because that can easily be changed.
But the latest beauty trend allows women to dip their toes into getting “inked” without the commitment, thanks to a variety of sophisticated, inexpensive and elegant temporary tattoo techniques.
“Temporary tattoos give women the opportunity to explore what it’s like having a tattoo without the pain or commitment, and help women see if this is a right fit for something permanent down the line,” says Aja-Noelle Poe, a tattoo artist at Ephemeral Tattoo, an innovative “made to fade” tattoo parlor that uses traditional tattooing equipment, but swaps in ink that the body breaks down to fade the tattoo within one to three years.
But whether it lasts 2 weeks or 2 years, temporary tattoos are also a form of self-expression: It could be that you’ve thought about getting a tattoo on a whim or to mark a moment in your life, but things can change, and you might not want to be stuck with a permanent mark of a temporary feeling or time in your life, adds Poe.
Read on for a bit of background on temporary tattoos and four of the most innovative temporary tattoo trends that look like the real thing…and how you can get the look at home.
A quick history of tattoos
Tattooing is an ancient art that has been around for thousands of years — in both permanent and temporary forms. Tattoos originally had religious or tribal significance, but today they’re broadly popular among people who are looking to make a style statement on their bodies. Tattoos can be deeply personal (many people get them to commemorate loved ones who have passed away), but they can also be silly or enigmatic or just plain pretty.
Tattoos didn’t become popular in the US until the 20th century. In fact, tattooing was illegal in cities like New York for many years due to its purported health risks and unsavory associations with subcultures. Tattoos gradually became more mainstream over the years, and recent surveys have found that as many as three in 10 Americans have at least one tattoo, and acceptance of body art is growing.
The practice of applying temporary body art can be traced back to ancient civilizations like the Egyptians and the Romans, who used henna and natural dyes to decorate their skin. In the 20th century, temporary tattoos gained popularity with the introduction of water-slide decals. These easy-to-use designs quickly became a hit, especially among children. But as technology advanced, temporary tattoos evolved to include custom, metallic, hyper realistic, scented, and even glow-in-the-dark designs, and the more sophisticated look began to appeal to people of all ages.
Realistic ‘waterslide’ temporary tattoos
When we think about temporary tattoos, those childish designs that we’d get out of vending machines at roller-skating rinks and bowling alleys that transfer to skin after you get them wet. But today’s versions of the ‘waterslide’ tattoo work in the same way, but are so realistic that you can fool your family and friends that you truly got ink.
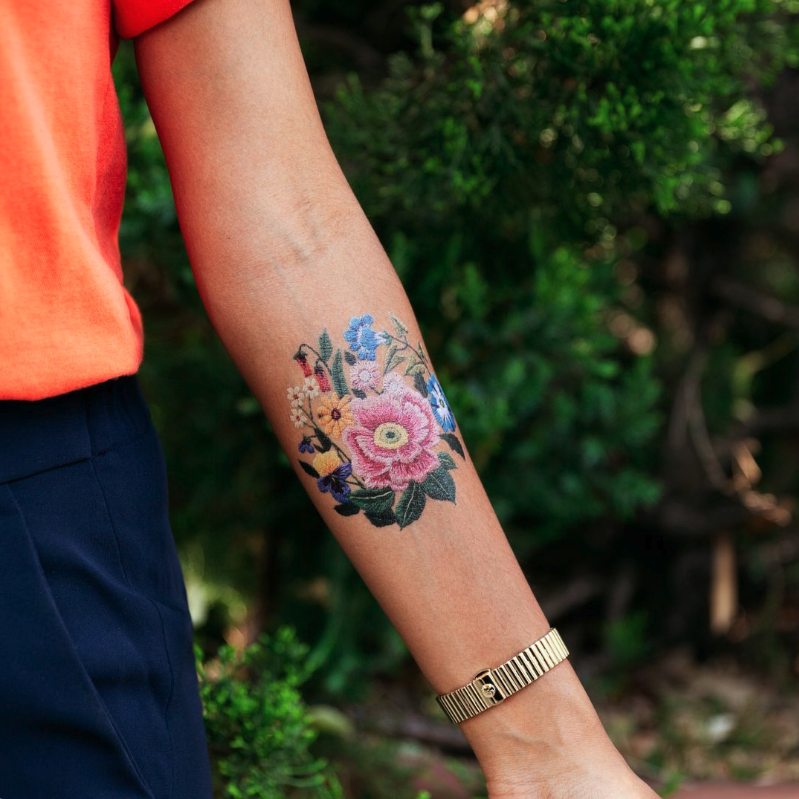
Realistic waterslide temporary tattoos last up to a week and come in a number of designs from more subtle styles like dainty miniature butterflies and ‘love’ in script letters to bolder looks like the phases of the moon and floral full-arm sleeves.
These artsy, realistic tattoos can be purchased online from boutique brands like Inked by Dani, Tattly (Tattly also even has scented versions!) and Inkbox. But it’s also possible to make them yourself if you’re feeling crafty.
How to make your own waterslide temporary tattoo
If you want to make temporary tattoos at home that are as close as possible to the real thing, you’ll want to do it with a printer. This would also be the best option if you’re planning on giving away your tattoos as gifts. Ready to get started? Here’s how to make temporary tattoos with a printer in five easy steps.
- Buy waterslide paper. This is the paper that traditional temporary tattoos come printed on. You remember how it goes, right? You stick the tattoo where you want it and then soak it with water. Water slide paper is available at craft stores or online (Buy from Amazon, $13.99).
- Design your tattoo. Create something on Photoshop or scan your design into the computer and then print it. Just remember that what you see will be mirrored in the tattoo, so if you want to include words, make sure they’re reversed in your design.
- Print your tattoo.
- Cut out the tattoo. You want to get close to the actual design so as to not waste paper, but don’t cut too close or you risk snipping off part of your art.
- Apply your tattoo. This process is just as you remember it: Wet a paper towel or cotton ball and press it on the temporary tattoo until the paper slides off your skin.
Any temporary tattoos you make with your printer will disappear over time. But if you want to speed up the removal process, you can use rubbing alcohol to wipe it away.
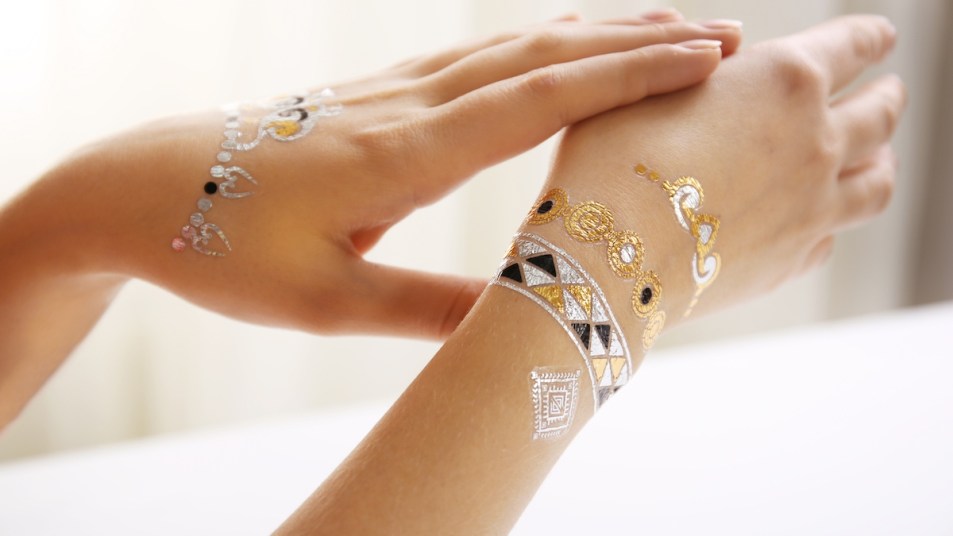
Jewelry or ‘flash’ temporary tattoos
A fun, modern way to play with temporary tattoos is to opt for ones that look like jewelry. “There’s an experimental and whimsical element to jewelry-inspired tattoos,” says Frances Pearce, owner of Flash Tattoos, a company that sells temporary metallic jewelry tattoos.
“They are high style and low commitment, so you have the ability to actually play around with your style. And they look amazing worn on their own, but also look so chic when paired with traditional jewelry for an even bolder look.”
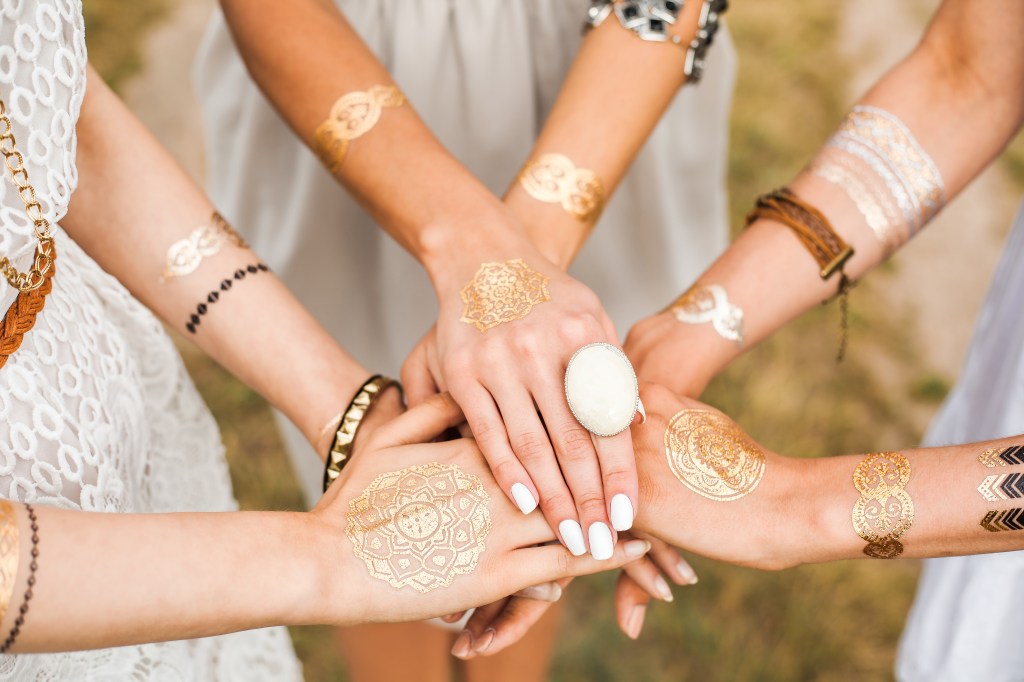
And unlike traditional jewelry, these temporary add-ons don’t feel heavy when being worn and can get wet without tarnishing. Plus, if you have allergies to metals, this type of temporary tattoo lets you get the look of wearing jewelry without the irritation.
Temporary jewelry tattoos are available for purchase in a variety of designs and prices from Flash Tattoos—the brand also has the option to create a custom design if you’re looking for a specific style. Or if you prefer to DIY it’s simple to make faux jewelry tattoos yourself.
How to make your own jewelry temporary tattoos
All it takes to create a jewelry-inspired tattoo is to grab some gold leaf foil, which can be found at craft stores or online (Buy from Michaels.com, $9.99), lash glue like Duo Striplash Adhesive in White/Clear (Buy from Amazon.com, $5.12), tape and something to seal the design. See below for the four easy steps.
- Cut a strip of the gold leaf foil so it’s at least ½” thick.
- Grab a roll of washi tape and tear off two 7” long strips. Tip: If you don’t have washi tape on hand, masking or painter’s tape can be used instead. Place one strip of the tape where you’d like the ‘bracelet’ to sit and wrap around your wrist, then leave a ¼” gap of skin and place the second strip of tape around the wrist.
- Apply a pea-size amount of lash glue onto skin in-between the two strips of tape and evenly distribute with a small paintbrush or a cotton swab. Let the glue dry for two minutes to get tacky.
- Place the piece of gold leaf face down on top of the area where the lash glue was applied and gently press down to help make it stick. Next, pull off the backing of the gold leaf and very gently remove the tape borders to reveal a ‘bracelet.’
- Seal with liquid band-aid or a clear nail polish top coat.
To remove, you can dab the area with cotton pads soaked with baby oil, coconut oil or micellar water and let sit on skin for 5-10 minutes, then gently buff off with a clean, damp cotton pad.
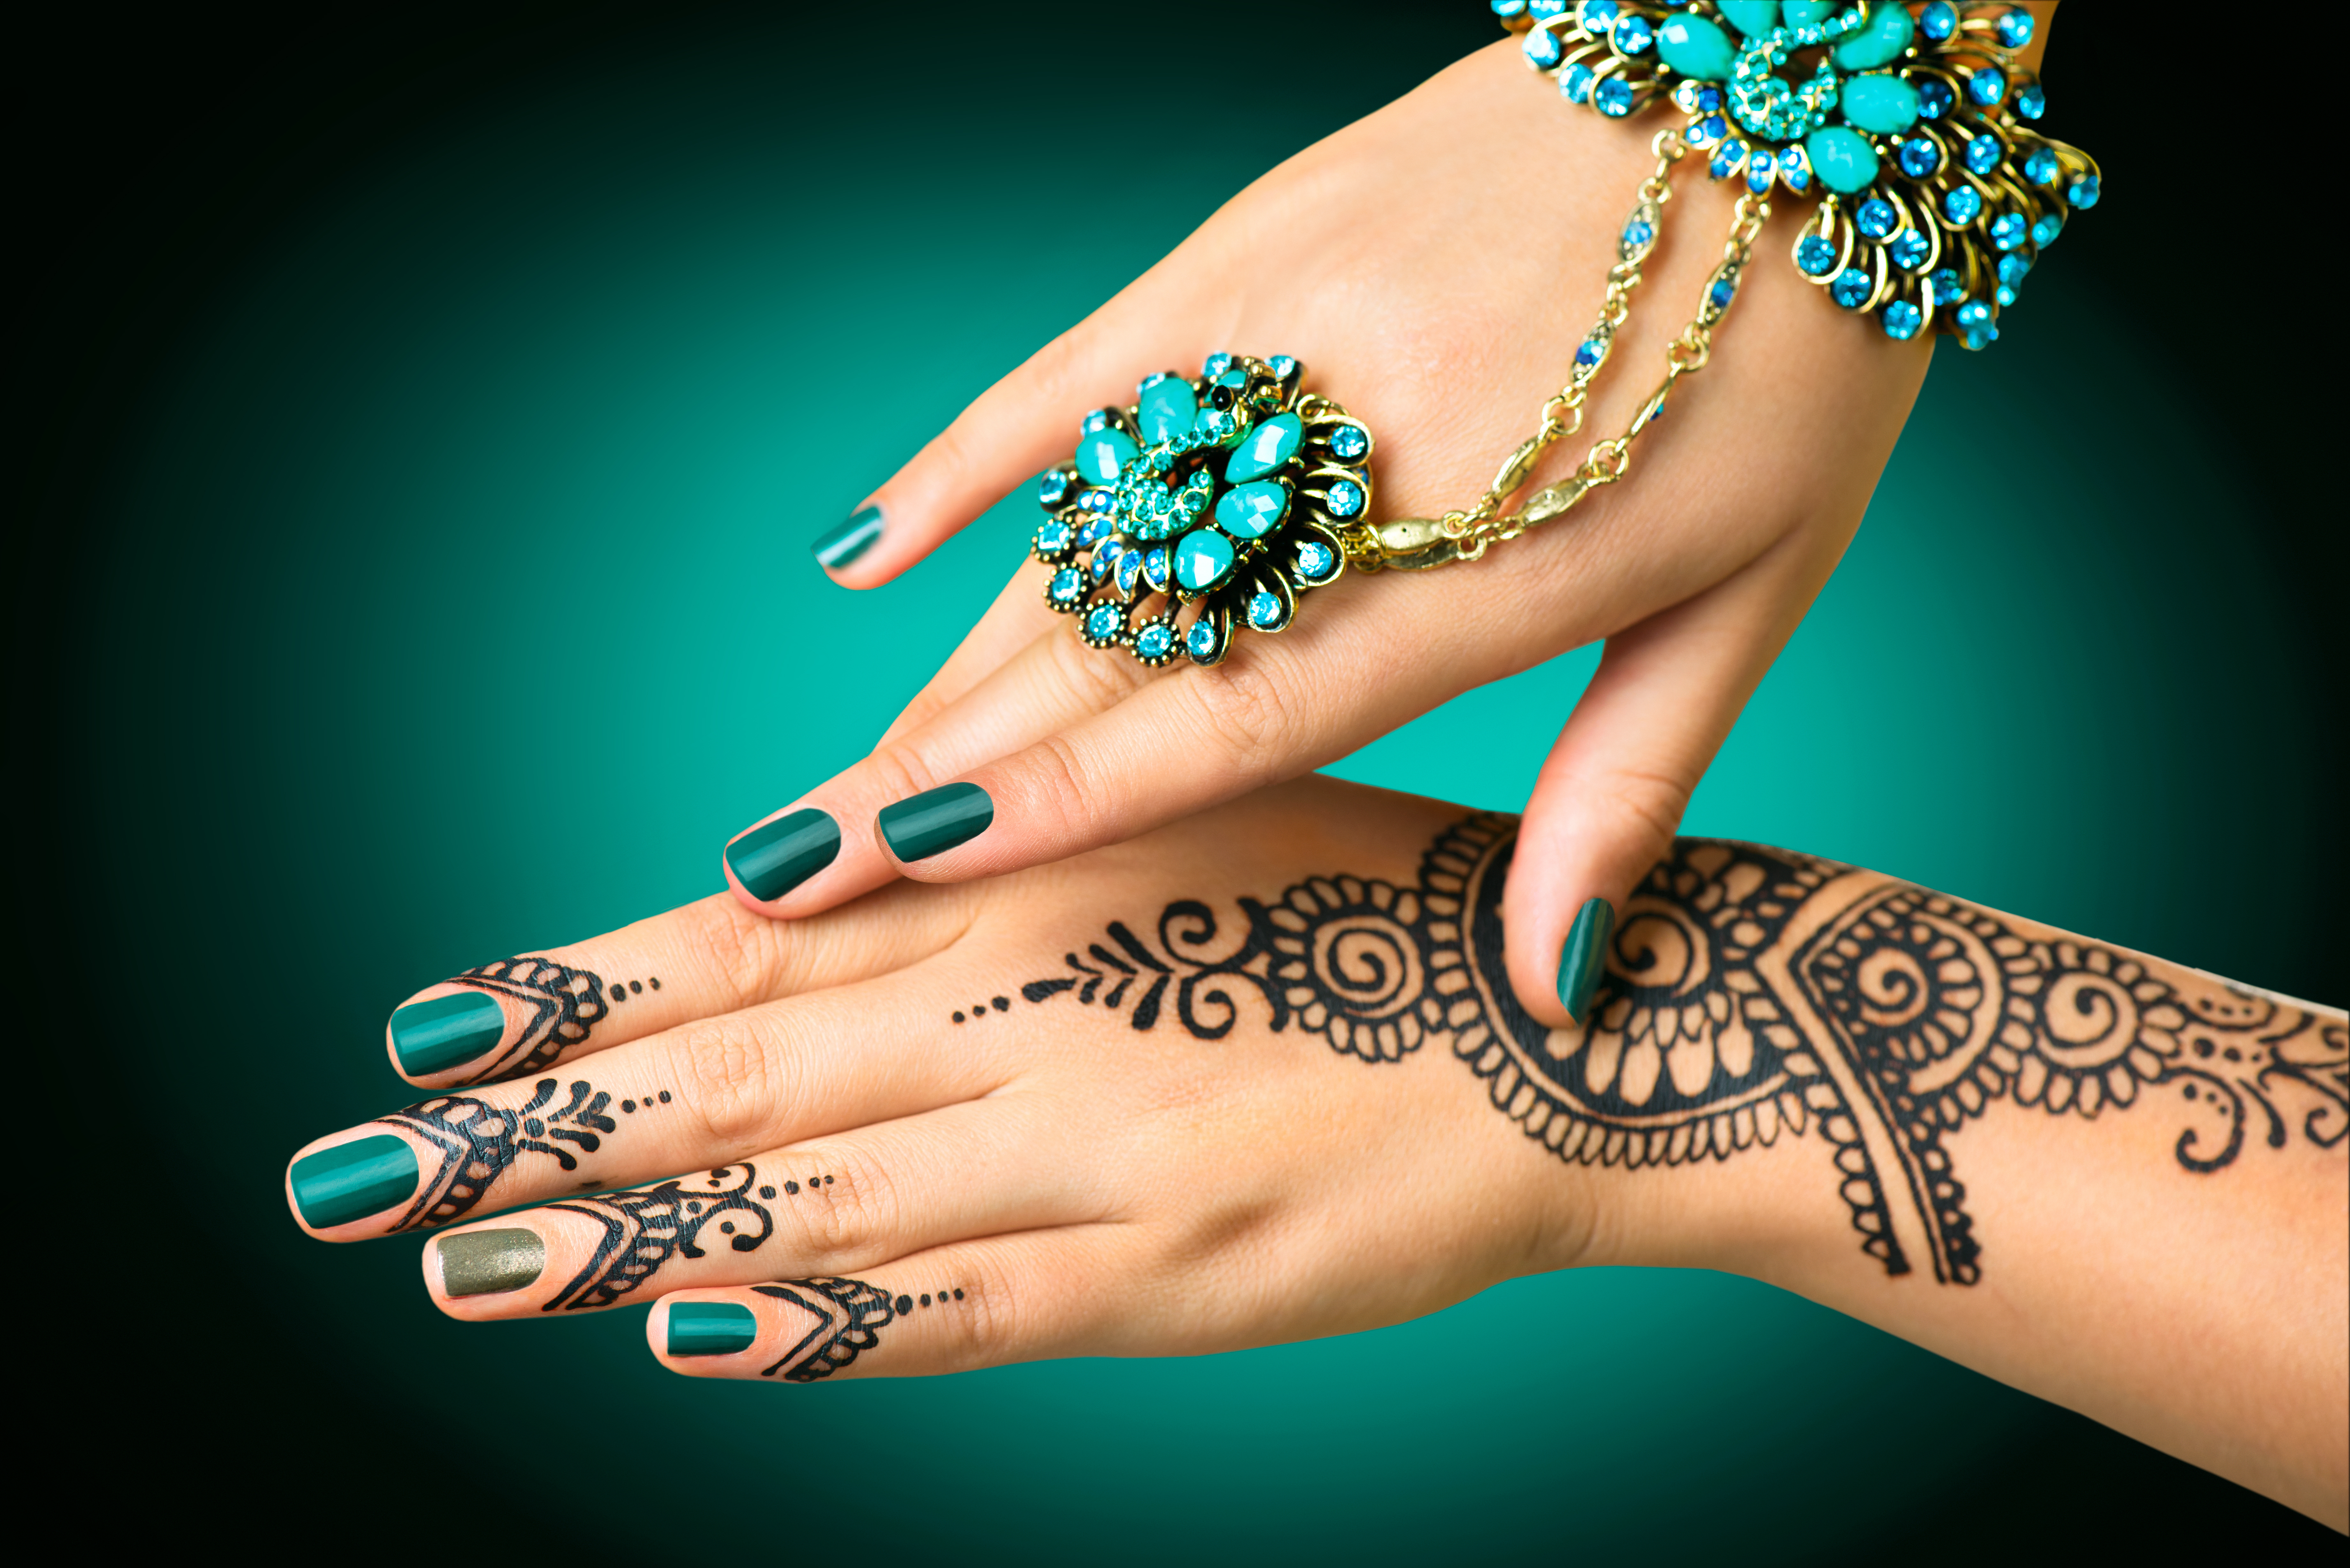
Henna temporary tattoos
Beautifully intricate Henna tattoos, also known as Mehndi, have been a part of Indian traditions for thousands of years. These tattoos are made using a natural dye derived from the henna plant that stains skin a dark brownish-red for up to two weeks so that you can test out different designs.
Plus, the essential oils in the henna paste have a skin-cooling effect as it dries to soothe skin and since the paste is natural, it’s a great choice for those with sensitive skin. To easily create a Henna tattoo at home, there are Henna kits for sale online (Buy from Mihenna.com, $37.99). These kits include everything you need to get going such as Henna paste cones, stencils and other tools to help you create designs.
How to make your own henna temporary tattoo
To begin you’ll need Henna paste, a Henna cone (which works kind of like an icing bag to distribute a thin line of paste) and a toothpick.
- Make a small cut to the Henna cone that contains the ink at the tip and test on a piece of paper towel before applying to skin.
- Have a photo of the design you want to create on hand and visible. You can find a variety of Henna tattoo design inspiration photos online. For beginners, it’s recommended to create a few rings on fingers or a bracelet on the wrist. Or use the kit’s included stencils to create more intricate designs.
- Use light, gentle strokes to apply the Henna onto skin as the paste will stains shortly after making contact with skin. Tip: Use a toothpick to quickly fix any mistakes as you create your design.
- Once you’re done creating your design, let the paste dry for at least three hours. Then, brush off the dry paste to reveal your tattoo. If any pieces of the Henna are hard to remove, use a damp paper towel.
Henna tattoos will fade over time and they typically last for two weeks. If you’d like to remove the tattoo sooner, use a gentle soap and warm water to help lift off some of the pigment—it will likely take a few days of using this method to fade the tattoo as the Henna paste stains skin.
Eyeliner temporary tattoos
For those who are confident in their abilities to draw or write freehand, designing temporary tattoos with eyeliner should be a breeze, and is one of the best ways to do a word temporary tattoo. You will need a waterproof eyeliner pencil — you can get these in various colors at the dollar store — as well as hairspray.
Here’s how to make your own eyeliner temporary tattoos
- Draw your design or write your word or phrase directly on your skin. If you need to practice beforehand, use a pen and paper. Don’t hold yourself to just black waterproof eyeliner; even though it will surely stand out, you can make a statement with colored eyeliner pencils if that’s more your style. Just make sure you’re not using liquid eyeliner, as this is more difficult to control.
- Splash your design with hairspray. You don’t need to go overboard with the spray; just enough for a light coating should be good. This step seals in your tattoo for a couple of hours. If you’re wondering how to make temporary tattoos not shiny, you can replace the hairspray with a matte nail polish top coat.
To remove a temporary tattoo made with eyeliner, simply scrub it with soap and warm water. You’ll need nail polish remover as well if you used a top coat instead of hairspray.
Have fun with it!
No matter which temporary tattoo technique you try, remember to have fun with it. After all, it’s not going to last very long, so you can feel free to get creative. Now go forth and create you temporary tattoo masterpiece!